In my garden

6

Posted by Pascale B

26 August, 2018 - , ,

Write a comment

Hello Sweeties

Today, I’m up on Maja Design blog for the last time. After 4 years, it’s time for me to say goodbye and it’s never easy, but don’t worry, you will continue to see me on the web. I want to thank Marie again for having me for such a long time, her kindness, and for her generosity.
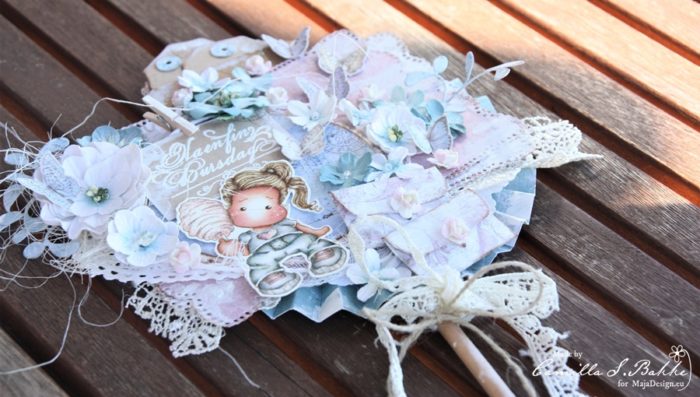
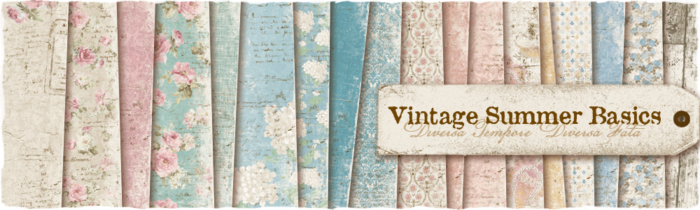
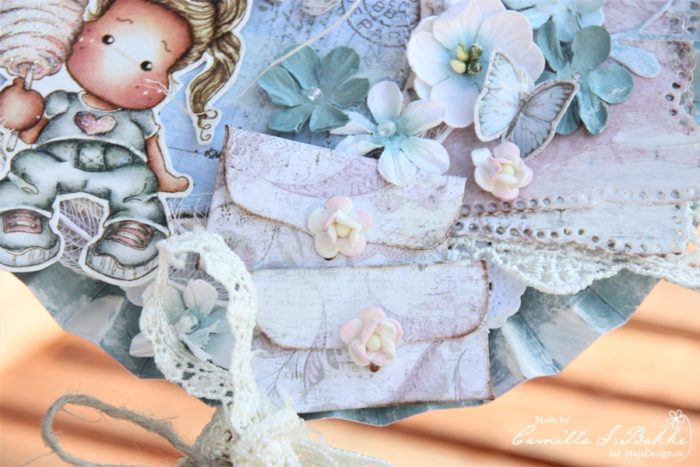
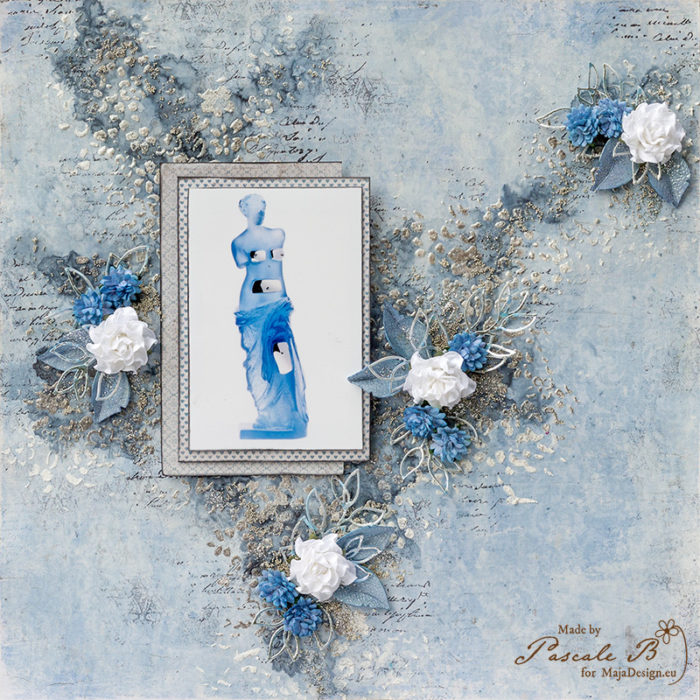
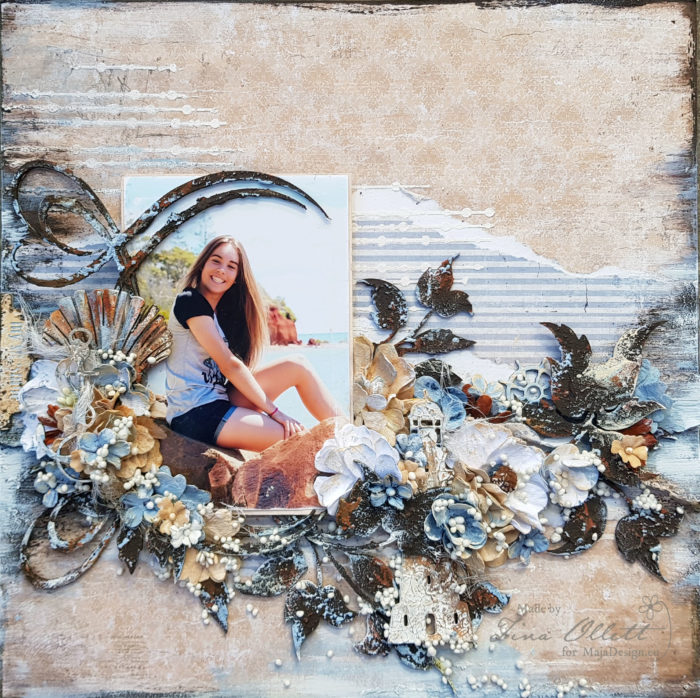
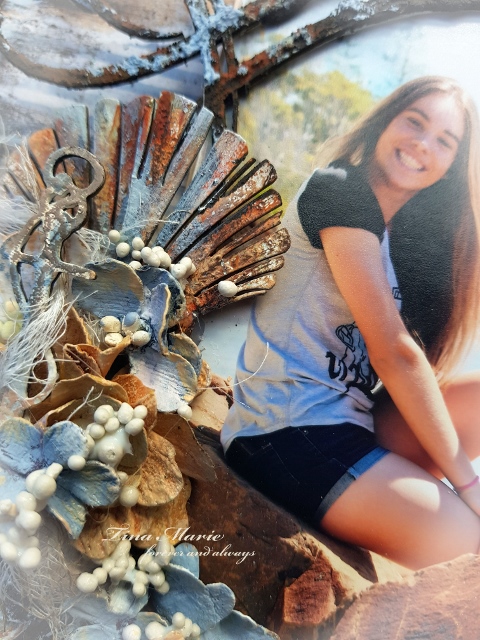
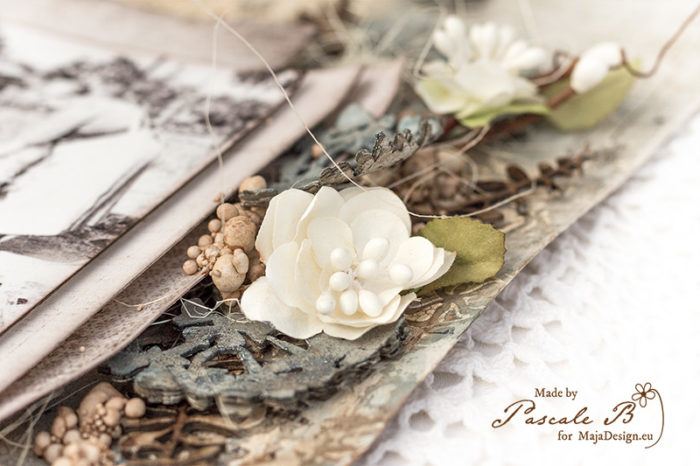
And for my last project, I made a layout featuring the Vintage Basics collections: I used the Summer and Spring collections. I work with another of my family treasure: on the photo, taken by my maternal grandfather, you can see his mother with his brother.

In my Garden by Pascale B.

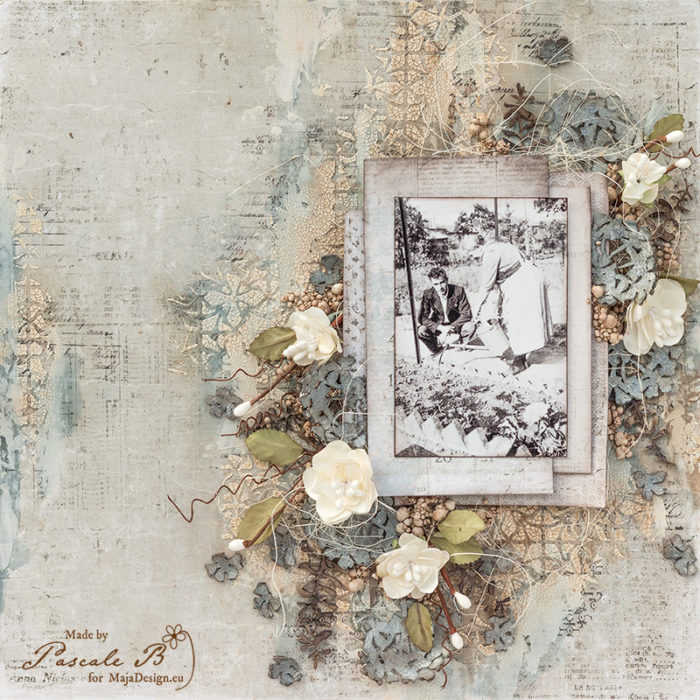
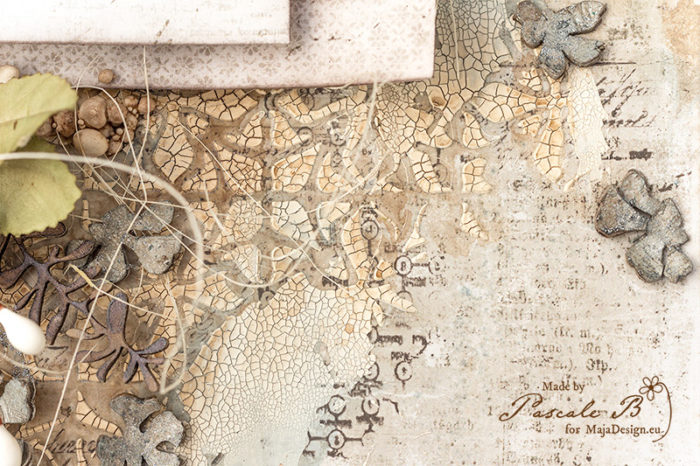
First I stamped randomly with a dark brown ink and different stamps. When done, I primed the background with clear gesso.

In my Garden by Pascale B.

I mixed together a brown magical with white crackle paste to add a design with a stencil. To give the effect of a peeling design I used my palette knife to remove some part of the design. I let dry naturally to allow the crackle to appear.

In my Garden by Pascale B.

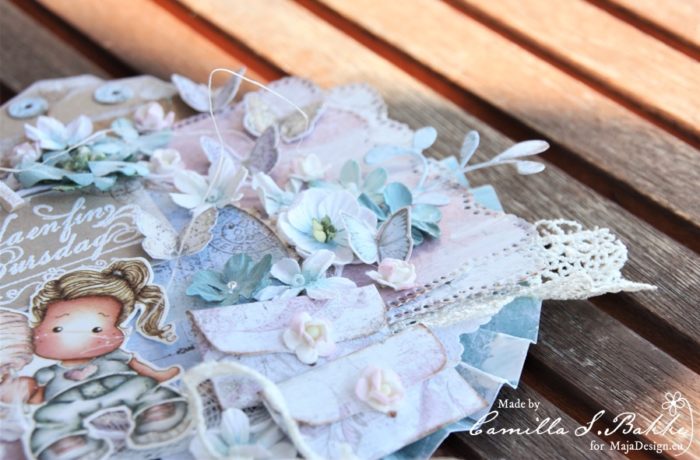
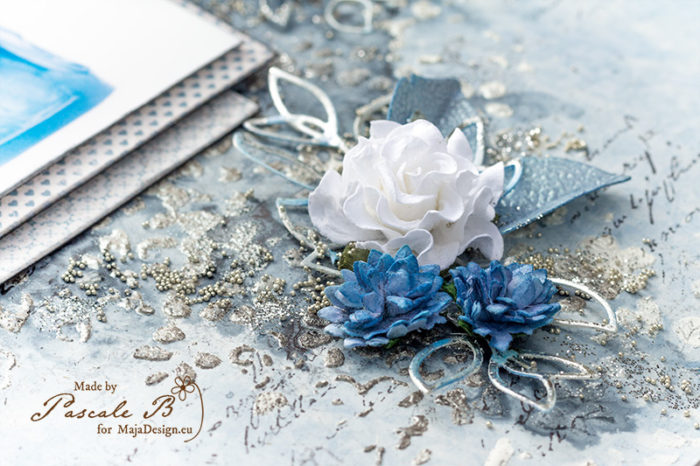
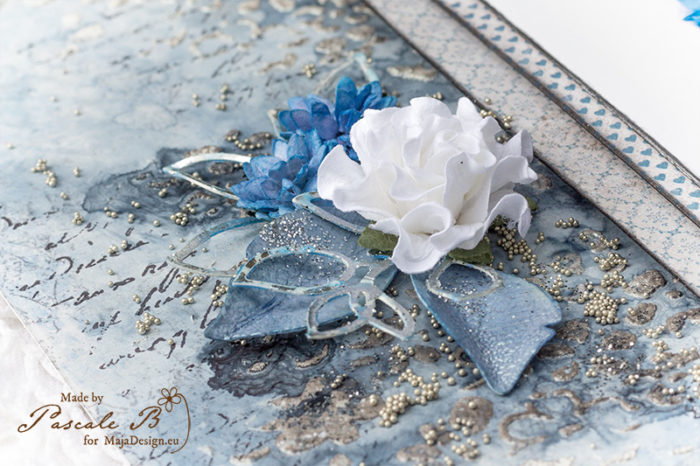
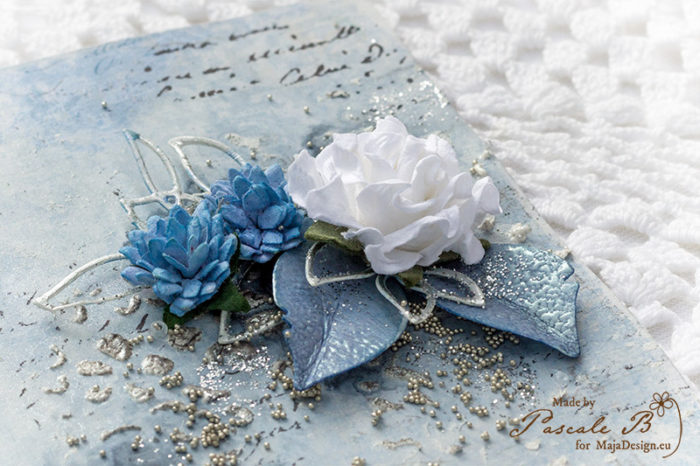
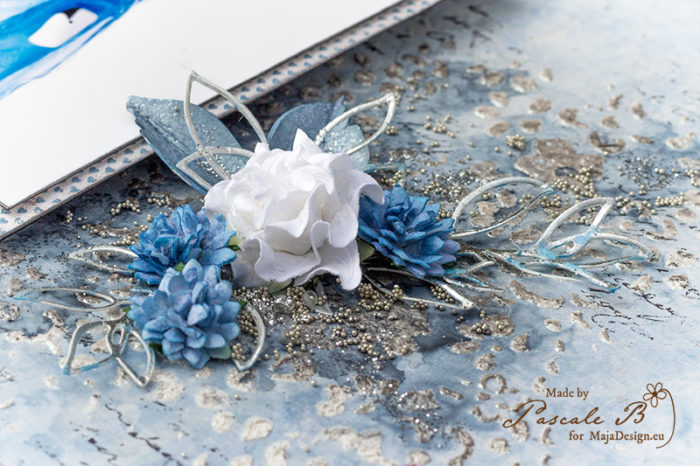
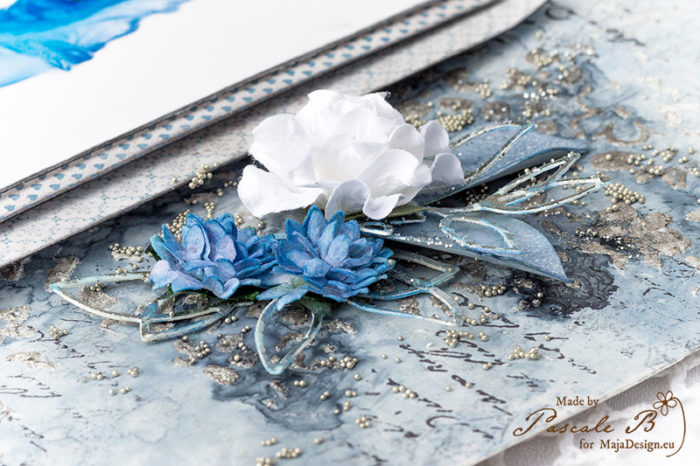
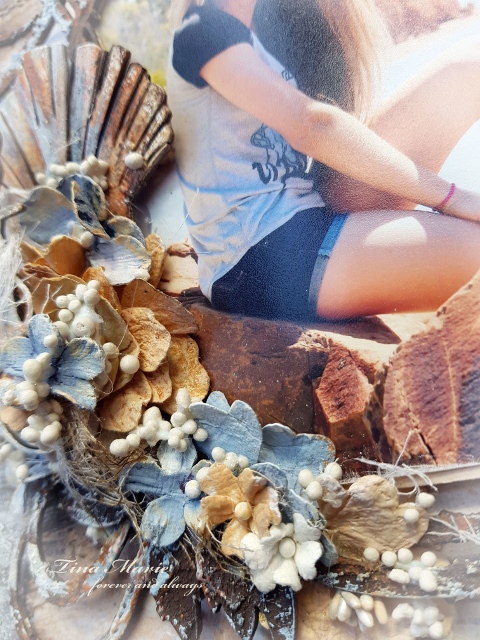
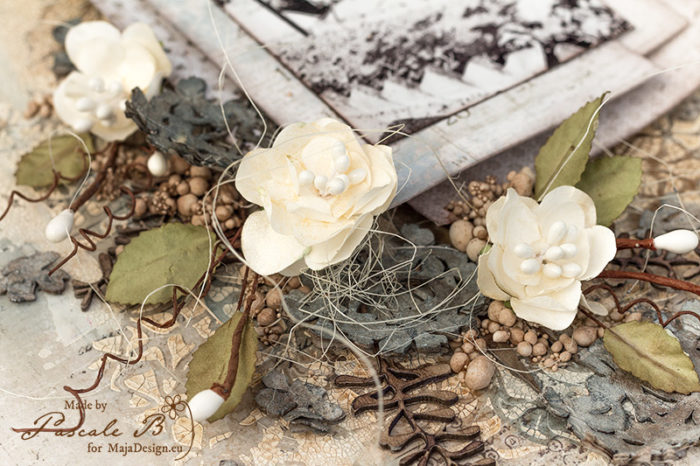
In the meantime, I soaked some flower chipboards in order to give them more dimension and texture. I gently pulled apart the edges to add more texture. After drying, I primed them with white gesso and I used blue and brown inks to add some colors.

In my Garden by Pascale B.

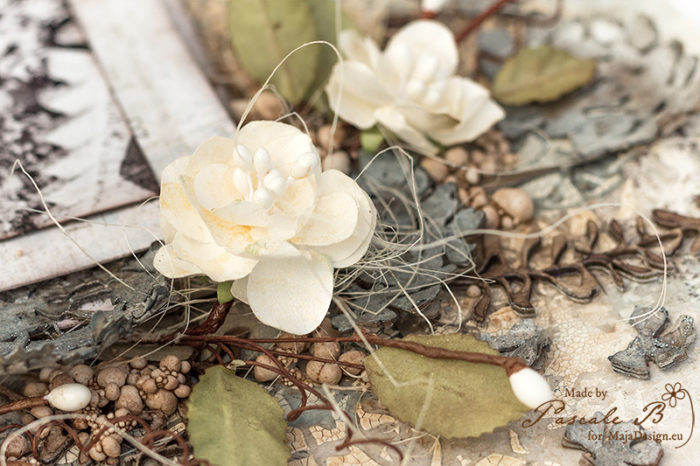
I just added some gold shimmer to the white flowers and some brown ink to the leaves. I colored also some leaves chipboards with the brown ink as well as a mix of different sizes of Art Stones.

In my Garden by Pascale B.

When the crackle paste was dry, I added some colors with the same inks to the background. Next, I cut a few papers to add under the photo before gluing all the embellishments.

In my Garden by Pascale B.

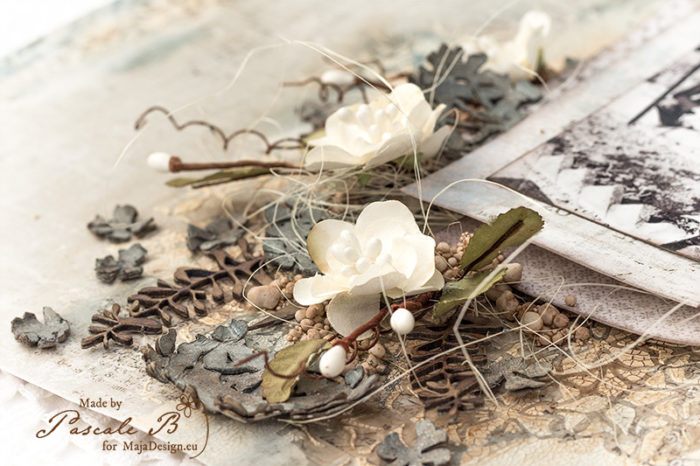
To finish the layout I add some fine glitters on top of the flowers chipboards and the Art Stones.

Maja Design papers:

Vintage-Summer-Basics-P

1946

1914
Vintage-Spring-Basics-P

1rt of March

6th of March

Birthday lollipop card

1

Posted by Camilla Støen Bakke

12 August, 2018 - ,

Write a comment

Hi everyone! Here comes a lollipop card I made for a friend of mine. I have used some lovely papers from the Vintage Summer Basics collection. Here comes some photos I took a lovely Summer day.

To make the card, I first start by folding two accordions 30 x 7 cm. I fold at every cm. Then I glue the two papers together and get a long accordion. And after that I make a circle with it, by gluing it to a paper underneath.

All the gorgeous flowers was a gift from Petaloo some time ago. I got so many flowers, that I still have many left after making some projects for their cooperation with Maja Design. The butterflies are cut out from the pattern paper (Vintage Spring Basics). The image is coloured with Distress Ink.

Some secret envelopes. Made from a Magnolia die, using beautiful papers from Maja Design.

The text (from Stempelglede) is embossed on craft paper (translated: Have a lovely birthday).

Here is a list of the papers used:


With love,

Minialbum Happy Summertime

1

Posted by Kerstin-Inga Peters

27 June, 2018 - , , ,

Write a comment

Welcome Maja friends!

Today I want to share with you another possibilitie, what you can do with the beautiful papers from Maja Design.

It’s a one sheet minialbum, that means for the basic you only need one background paper in 12 x 12″.

I chose from the Vintage Summer basics collection ”1936”, both colours are very suitable to my theme

 blue, for the sea and brown, for a memoryin vintage style.

As addition some sheets from the Summertime collection.

I used some photo’s from our sheltie, a beautiful memory on last summer and really he is an aquaholic, even like me 🙂


on the right side you can see a ATC frame and some mini wooden shapes from Calico Craft Parts, a beautiful addition

where I used white crackle paint from DecoArt for an altered effect

other products:

cutting dies – Memory Box, Kaisercraft

Distress ink Vintage photo – Ranger

maritim clear stamps from different companies

Thanks for your visit!

Have a beautiful summertime my friends!

Blue Venus

2

Posted by Pascale B

17 June, 2018 - , ,

Write a comment

Hello Sweeties

Today, I’m up on Maja Design blog with a new layout featuring the Vintage Summer Basic collection. I chose a photo of the Daum Venus aux Tiroirs by Salvador Dali.

Blue Venus by Pascale B.

I stamped here and there with a grey ink before priming the background with clear gesso. I added also a very thin layer of white gesso to tone down the blue.

Blue Venus by Pascale B.

Next, I added a design with a stencil and Paper texture paste. While the paste was still wet, I sprinkle two embossing powders: one pearl, the other silver that I heat set.

Blue Venus by Pascale B.

Then, I added some colors: black ink, white ink, and steel mica to add some contrast.

Blue Venus by Pascale B.

While the inks were drying, I die cut some leaves in a watercolor paper. I colored with a blue ink and embossed the big ones. I covered the other ones with a silver foil. I colored some flowers in blue.

Blue Venus by Pascale B.

I cut some papers in the Home for Holidays collection to add under the photo. Before gluing all the embellishments, I stamped some text here and there with a black ink.

Blue Venus by Pascale B.

To finish the layout, I added silver microbeads and glitters.

Maja Design papers:


Vintage Summer Basics
1914 bs

Home for the Holidays
Love the snow bs

Home for the Holidays
Family

“My Sunshine” by Tina Ollett

7

Posted by Tina Ollett

12 June, 2018 - , , ,

Write a comment
 A very big welcome my Maja Design friends.
Tina Ollett here with you today to share a project created recently showcasing patterned papers from three gorgeous collections of Maja Designs.
It is titled “My Sunshine” and was inspired by a photo taken down at Redcliffe whilst we were making a visit to see some friends for coffee and milkshakes.
 
This project was originally going to be very shabby chic until I come across this photo with the rustic rocks that my daughter was sitting upon for the photo. Once I spyed these, the project automatically changed up to a rustic grungy kind of project which I totally miss doing.
Monochromes Shades of Denim – Off White


Vintage Summer Basics – 1915

Vintage Romance – Deep Love bs

 I started my project off by layering papers from the Vintage Summer Basics (1915) and  Vintage Romances “Deep Love” bs . I primed my background to fix it. Dusty Attic Texture paste was used throught the Threaded Bead Stencil to create a little texture going across my page following the stripes from the papers that I used.
 
 I used some Rust Paste over my chipboards along with acrylic paints and art stones.
 I love how the large seashell as seen above here turned out. It was dressed similarly to the leaves but less emphasis on the browns. They were placed on lastly to highlight the blue and orange tints.
 
 I also coloured some of my pretty florals with acrylic paints as you can see above .
And a yummy view of the Swirly Frame that I used on this project.
Thank you for making the visit here today.
Until next time take care and happy crafting.
Hugs Teen xo