Autumn Wedding

1

Posted by Maja Nowak

26 September, 2018 - ,

Write a comment

Good morning, dear visitors to the Maja Design blog!

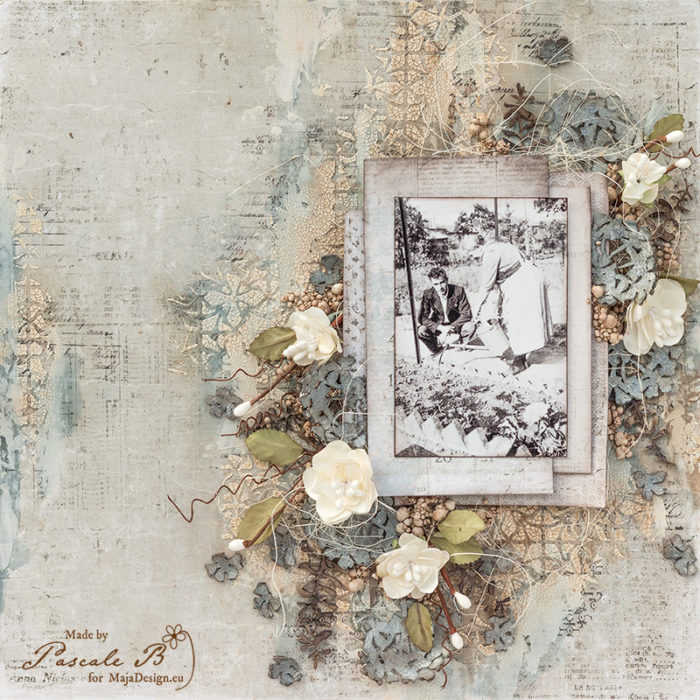
Autumn has just begun and although we can still enjoy some warmer days, nights become colder and colder and leaves turn yellow and orange, a sure sign of the autumn season. And so for today I have an autumn wedding layout to share:

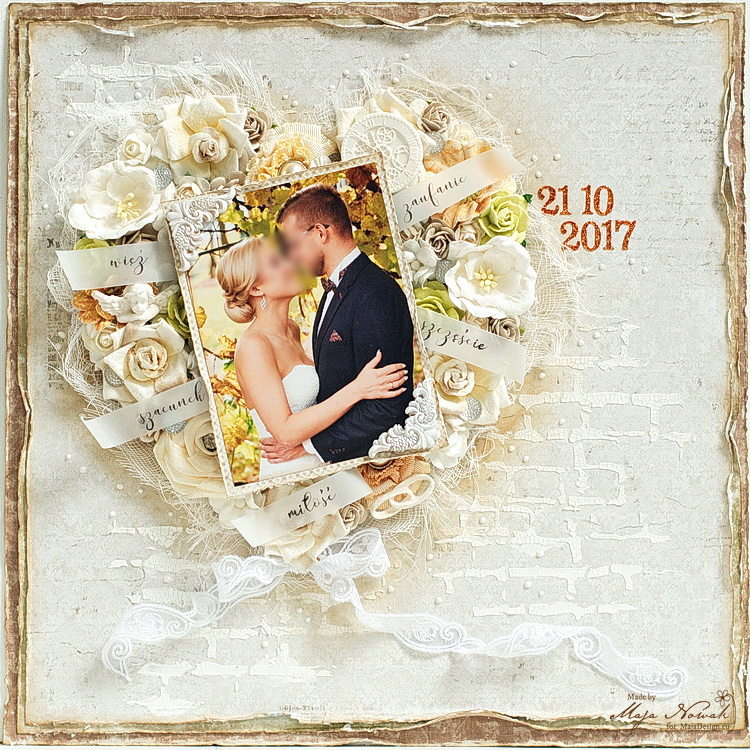
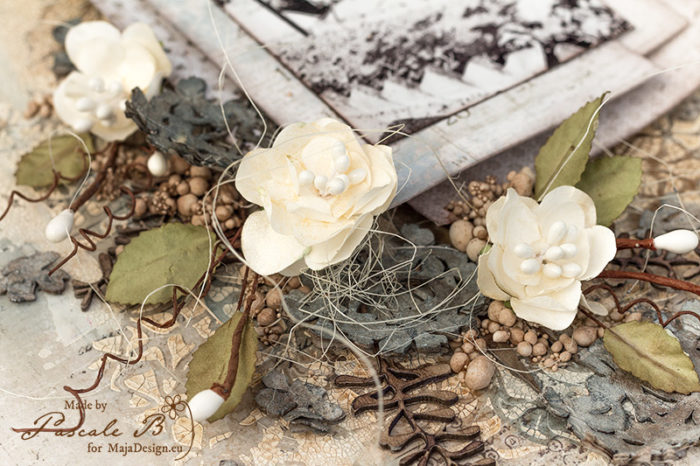
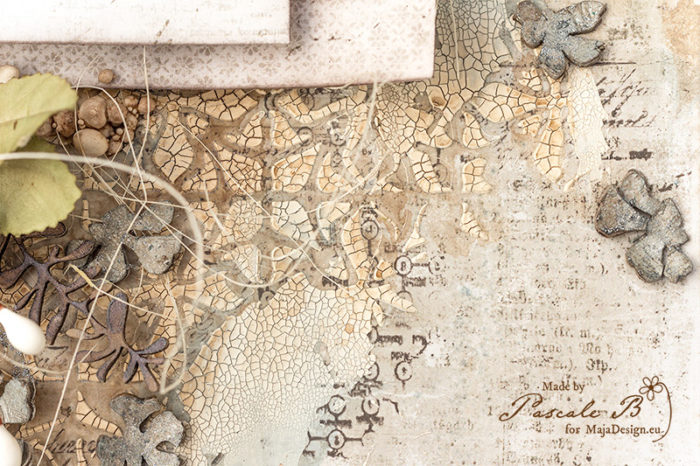
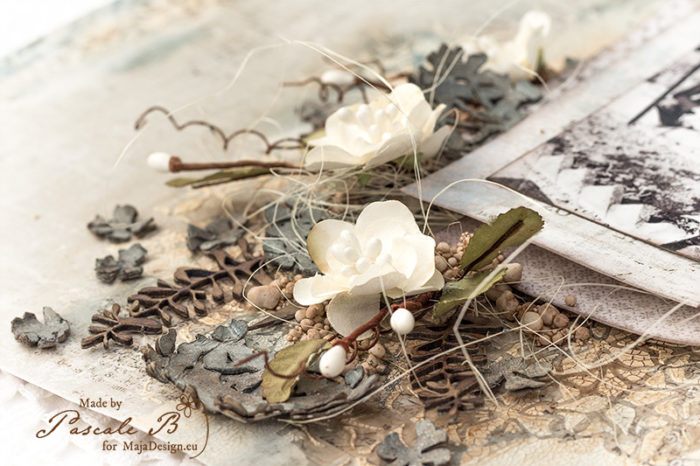
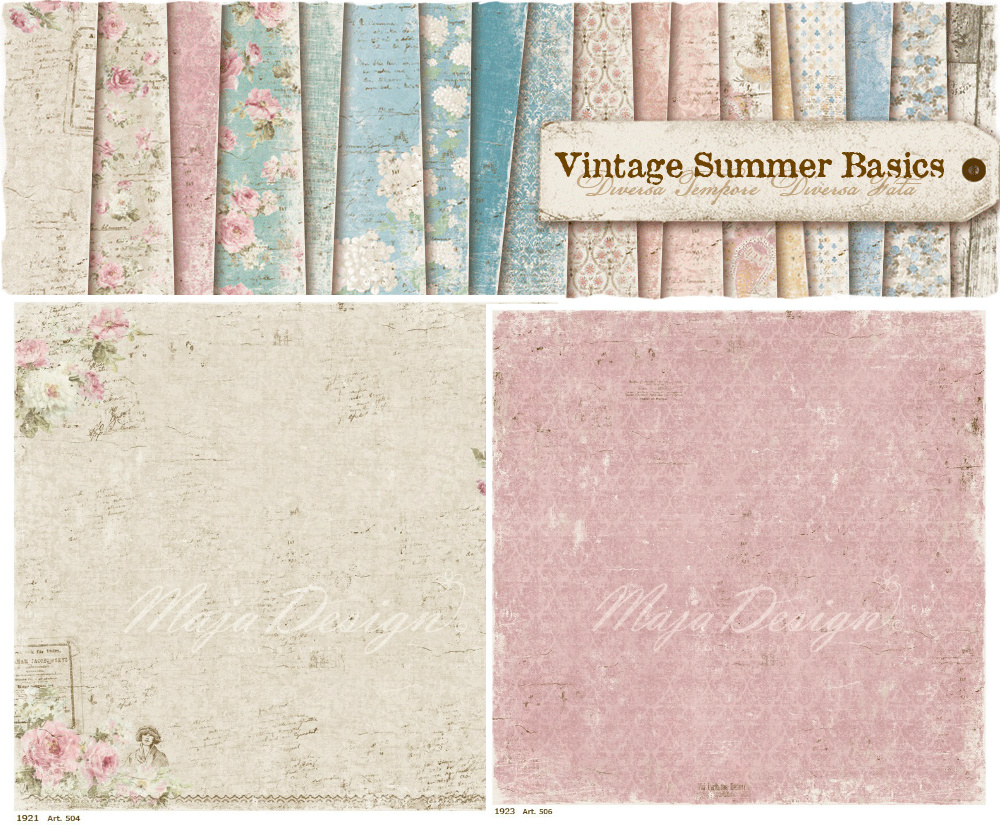
For this page I decided to keep the colour palette of the photo: yellow, pale orange, delicate green and pastel brown. This is perhaps not my frequent choice of colours, but it was surprisingly nice to work with. First I built the background using papers from the Enjoying Outdoors and Vintage Summer Basics collections. The I added some brick pattern onto the top sheet using a Prima stencil and crackle paste:

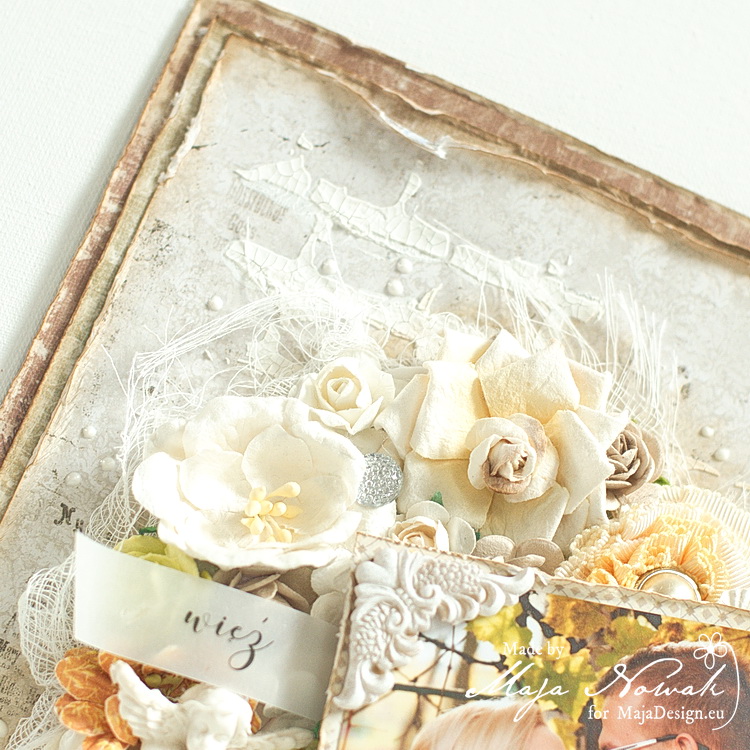
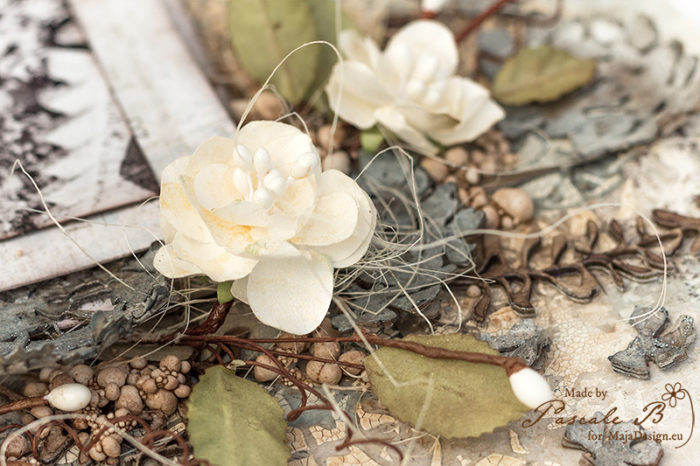
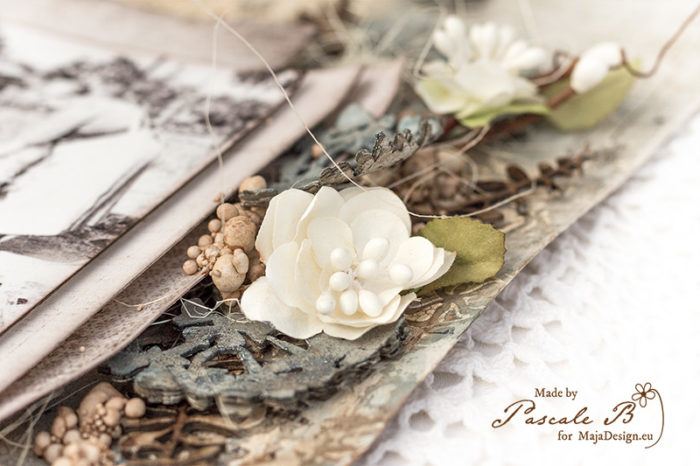
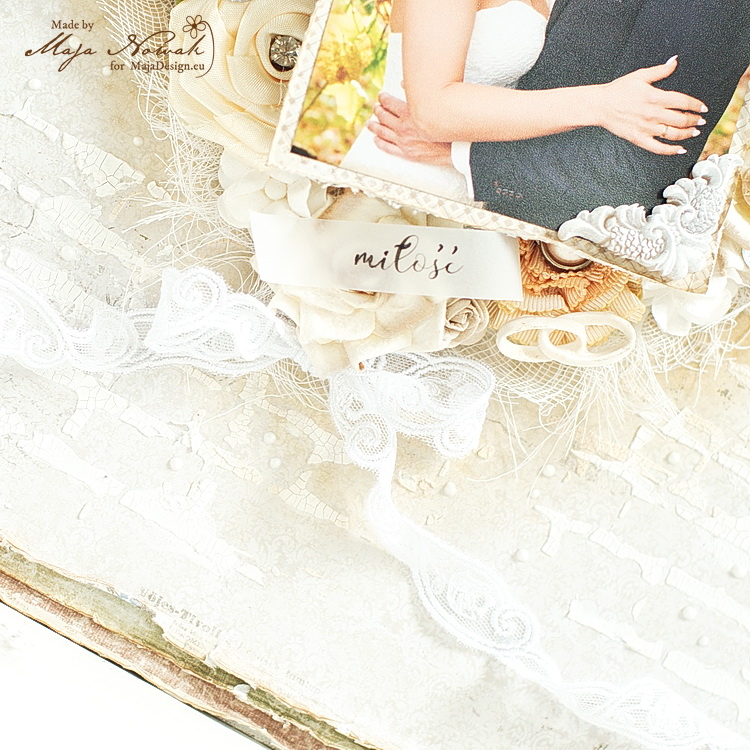
I kept the design rather simple, with a flowery heart matting the photo as the only decorative element. I added some white resin embellishments among the flowers and some theme words describing marriage features around the photo. Under the heart I attached a delicate lace bow. The heart is also matted with frayed cheesecloth.

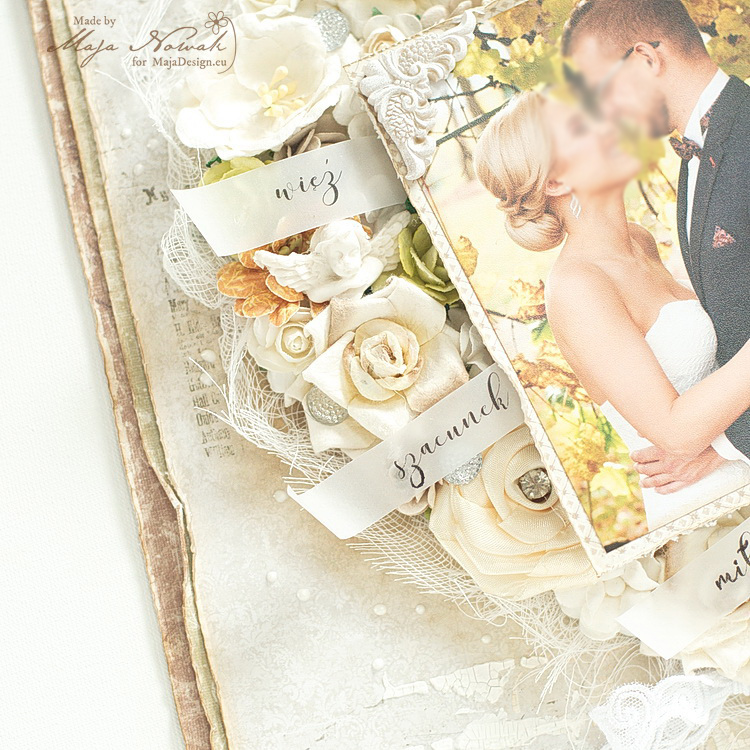
The layout is quite dimensional and perfect to go into a shadowbox-like frame.

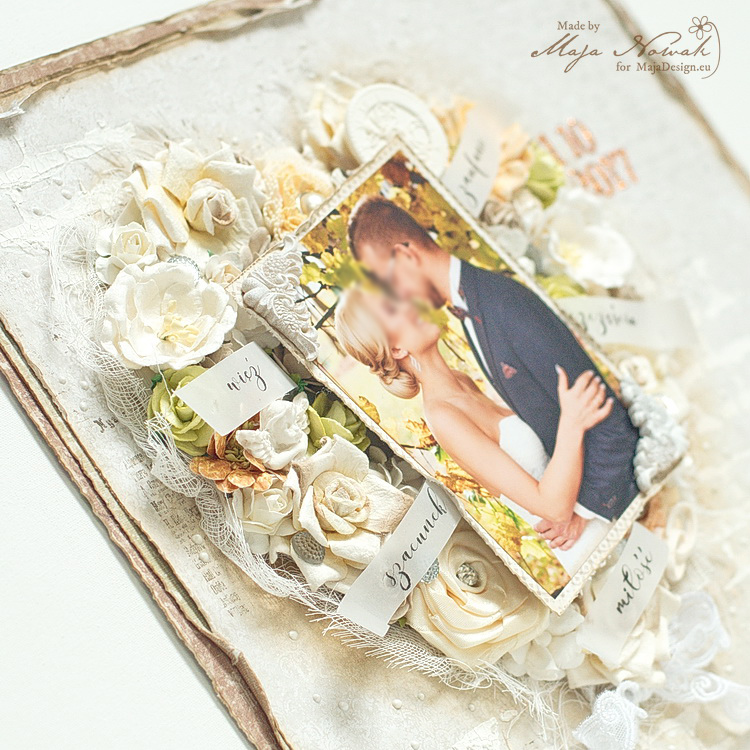
I really like the way it turned out, light and delicate with some touches of bright colours, with the photo still in focus. What do you think?

And here’s the list of my supplies:

Maja Design papers:

Other: flowers, stencil, crackle paste – Prima; resin embellishments: handmade with Prosvet moulds; cheesecloth, bling, lace – my stash.


Thank you for visiting and see you later!

Treasure your memories.

2

Posted by Lenet Mos

30 August, 2018 - , ,

Write a comment

Hello Maja fans  Lenet here and to day I bring you this altered frame  I bought at the local dollar store.

It was a simple grey  3D  that I wanted to give a weathered look like it has been laying at the beach for a while because I wanted to use these pics. of my friend and her kids that were taken at the beach.

So I distressed  the frame by sanding it and than dry brushed it with Finnabair art basics Plaster paste and made some little termite holes in it.

I made the little pegs that hold the pictures grey with chalkgrey Ayeeda mist from 13@rts and dry brushed them also with the plaster paste

For the back ground I used Vintage Summer Basics1936 as the sky and cut the fence from Vintage Summer Basics 1905


The create the sand I used  Finnabair artstones mixed with artbasic 3D Matte Gel Transparent and pushed some litte shells in it.

A little seastar  and some fishingnets in the corners to finished it off.


Thank you for watching and hope to see you back


In my garden

6

Posted by Pascale B

26 August, 2018 - , ,

Write a comment

Hello Sweeties

Today, I’m up on Maja Design blog for the last time. After 4 years, it’s time for me to say goodbye and it’s never easy, but don’t worry, you will continue to see me on the web. I want to thank Marie again for having me for such a long time, her kindness, and for her generosity.
And for my last project, I made a layout featuring the Vintage Basics collections: I used the Summer and Spring collections. I work with another of my family treasure: on the photo, taken by my maternal grandfather, you can see his mother with his brother.

In my Garden by Pascale B.

First I stamped randomly with a dark brown ink and different stamps. When done, I primed the background with clear gesso.

In my Garden by Pascale B.

I mixed together a brown magical with white crackle paste to add a design with a stencil. To give the effect of a peeling design I used my palette knife to remove some part of the design. I let dry naturally to allow the crackle to appear.

In my Garden by Pascale B.

In the meantime, I soaked some flower chipboards in order to give them more dimension and texture. I gently pulled apart the edges to add more texture. After drying, I primed them with white gesso and I used blue and brown inks to add some colors.

In my Garden by Pascale B.

I just added some gold shimmer to the white flowers and some brown ink to the leaves. I colored also some leaves chipboards with the brown ink as well as a mix of different sizes of Art Stones.

In my Garden by Pascale B.

When the crackle paste was dry, I added some colors with the same inks to the background. Next, I cut a few papers to add under the photo before gluing all the embellishments.

In my Garden by Pascale B.

To finish the layout I add some fine glitters on top of the flowers chipboards and the Art Stones.

Maja Design papers:

Vintage-Summer-Basics-P

1946

1914
Vintage-Spring-Basics-P

1rt of March

6th of March

Birthday lollipop card

1

Posted by Camilla Støen Bakke

12 August, 2018 - ,

Write a comment

Hi everyone! Here comes a lollipop card I made for a friend of mine. I have used some lovely papers from the Vintage Summer Basics collection. Here comes some photos I took a lovely Summer day.

To make the card, I first start by folding two accordions 30 x 7 cm. I fold at every cm. Then I glue the two papers together and get a long accordion. And after that I make a circle with it, by gluing it to a paper underneath.

All the gorgeous flowers was a gift from Petaloo some time ago. I got so many flowers, that I still have many left after making some projects for their cooperation with Maja Design. The butterflies are cut out from the pattern paper (Vintage Spring Basics). The image is coloured with Distress Ink.

Some secret envelopes. Made from a Magnolia die, using beautiful papers from Maja Design.

The text (from Stempelglede) is embossed on craft paper (translated: Have a lovely birthday).

Here is a list of the papers used:


With love,

Elegant Summer Wedding Card

0

Posted by Jennifer Snyder

21 July, 2018 -

Write a comment
 Thanks for stopping here today.
I’m Jennifer Snyder  and I would like to share a wedding card I made for my niece.
When I need gorgeous elegant paper, I reach for paper from Maja Design.
My niece is having an “end of summer’ wedding, so I decided to pick papers from
Vintage Summer Basics collection – with it’s wonderful array of blues, teals, pinks and creams.  These are the two papers I used from the collection:
1921
1923

 This card is a shaker card.  I filled the chipboard heart designs with light pink crystal gems.    The image below shows the dimension of the chipboard hearts from Creative Embellishments.


 Thanks for stopping by today.  Happy crafting.  
 
Where to shop? 
You can shop for Maja Design Papers using the Store Finder link right here