Hi there! I am Camilla S. Bakke. I am so, so happy to be guesting this amazing team with the most beautiful pattern papers you can imagine!
But first something about myself. I live in Norway together with my husband, our two year old son, and two spoiled cats. I work full time as a teacher. And this year I work in lower secondary school as a teacher in 10th grade.
But apart from that I love working with stamps and papers. And Maja Design is my absolutely favorite! I love each new collection, and sometimes I feel it is hard to use them, because they are so beautiful.
I like making cute cards, with a vintage or shabby touch. And I think the papers from Maja Design fits my style perfectly. I like pastels, and also laces, doilies, butterflies, post marks… The list is long. But most of all, I enjoy colouring the images with Distress Ink. And I feel that the colours I use, fits the colours on the Maja Design pattern papers so well.
As you might understand, with a job like mine and a two year old; there is not that much room for my hobby. But when I feel I can allow to treat myself, I make a card!
I am going to show you some new projects today, and also a small tutorial on how I make homemade flowers.
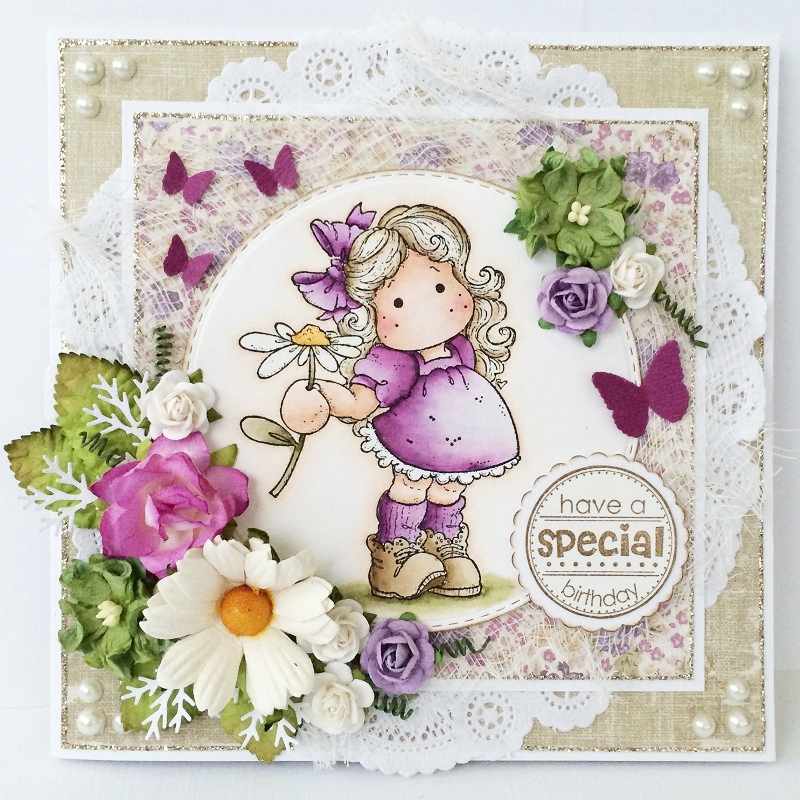
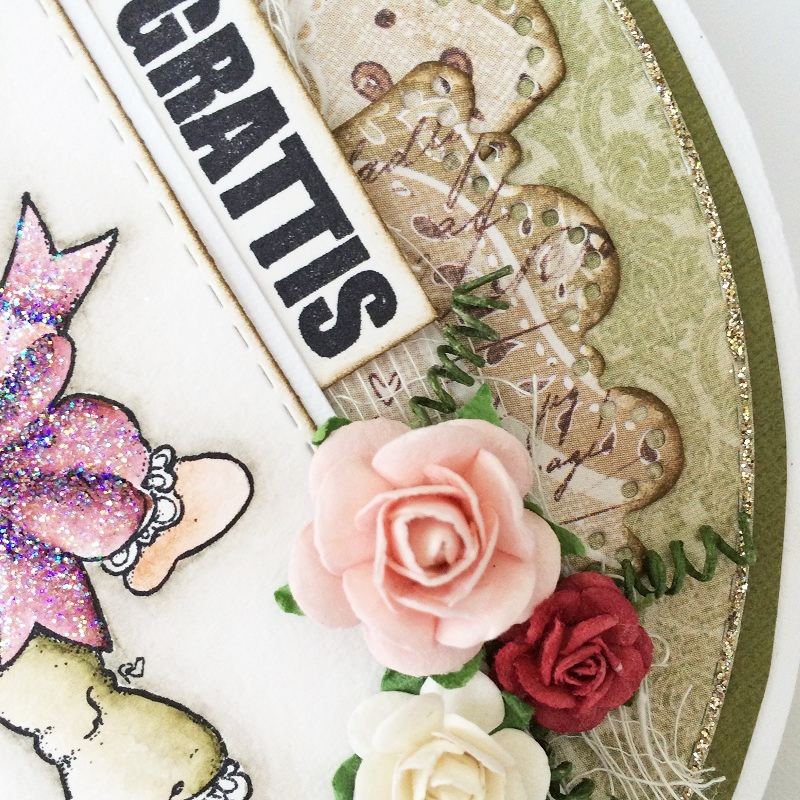
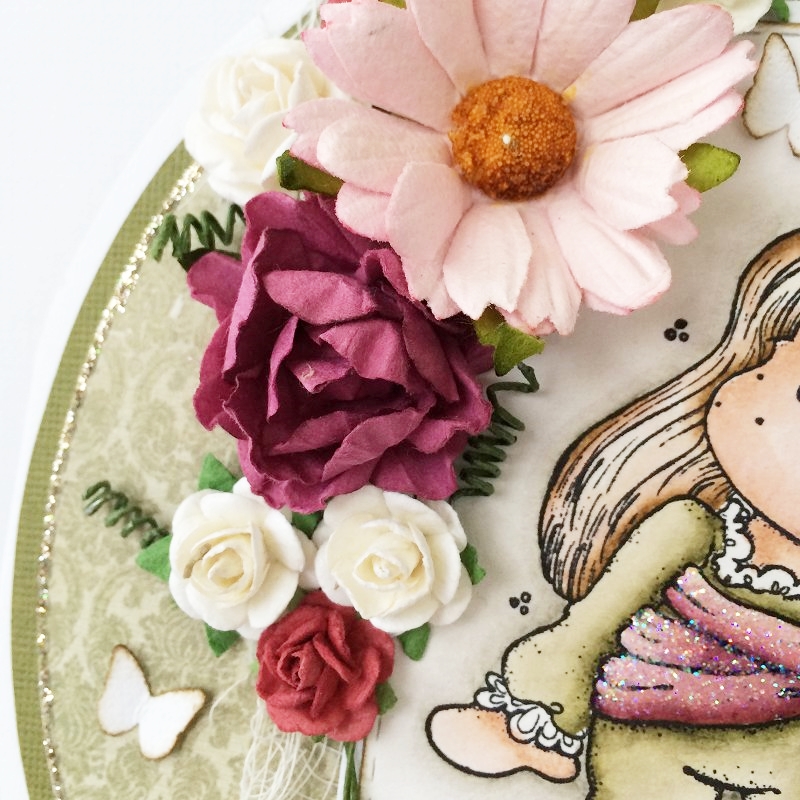
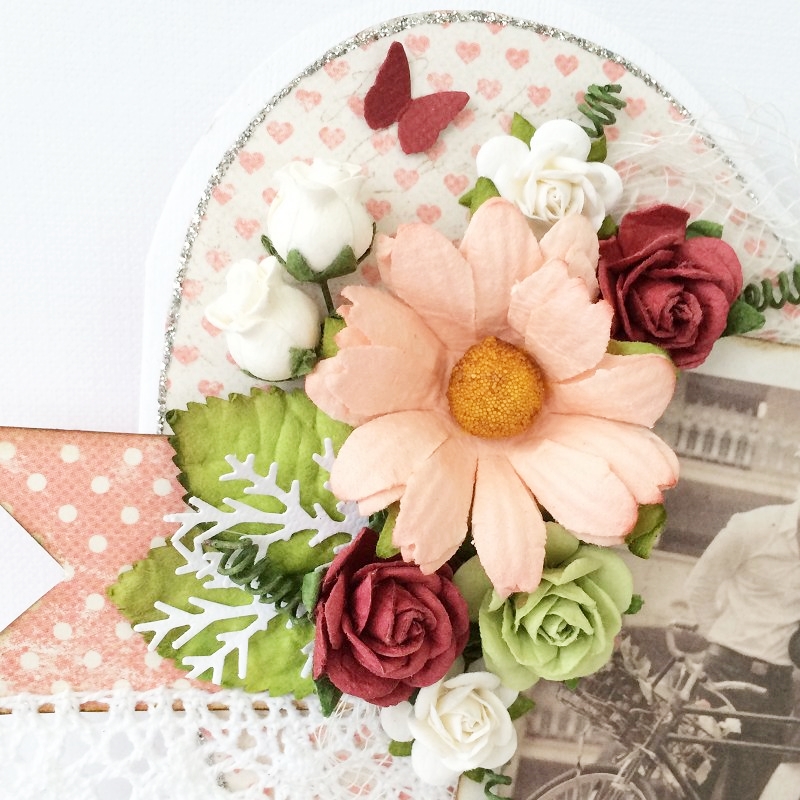
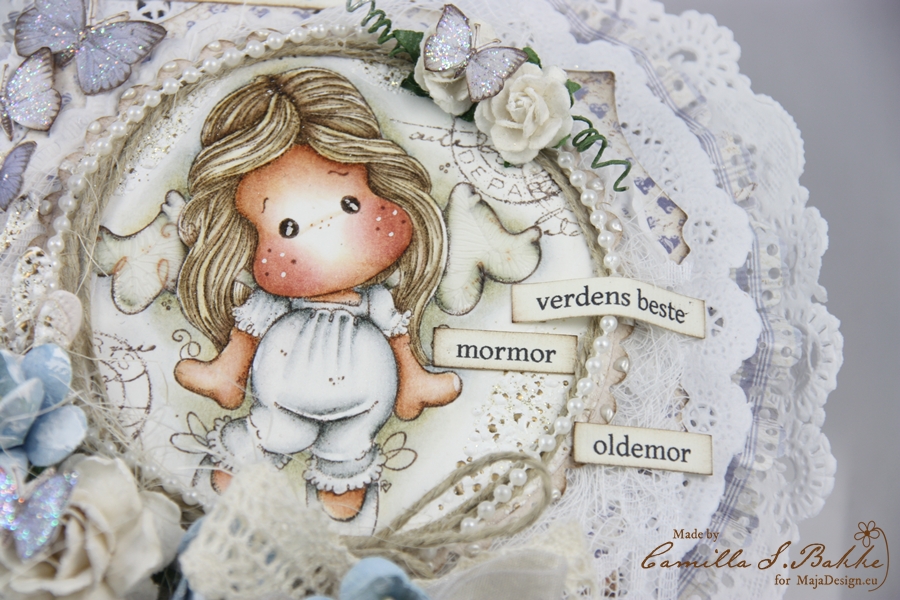
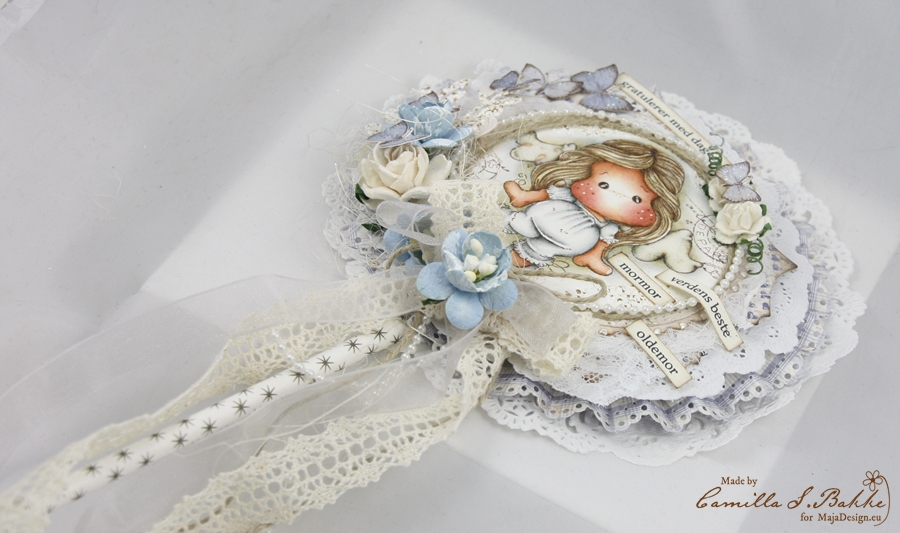
But first to a lollipop card I made to my sweet grandmother Sigrid, who celebrated her birthday last month.
Lollipop cards are fun to make, and I can see they are popular in Norway now. This is my first!

The lovely pattern papers I have used on my lollipop are from the collection Coffee in the Arbour, “Blueberry cupcake”, “Lovely weather” and “Butterflies are free” (I have cut out the butterflies from the paper).
The text is written on my computer and printed out on watercolour paper. The postmark stamp is from Stempelglede. The flowers are from Wild Orchid Crafts. I have also added Frantage as white spots around the image. And the glitter on the butterflies, is Stickles – Star Dust.

The image from Magnolia is coloured with Distress Ink, re-inkers and Markers. The blue colour I use is called Weathered Wood, and I use my Marker for this colour. The dark shadows are made with the colour Hickory Smoke (also the Marker).
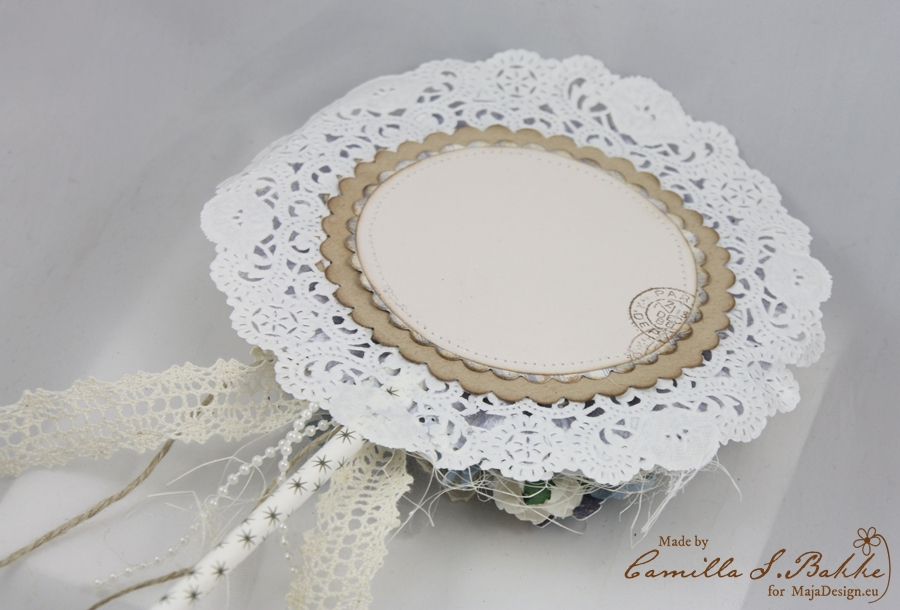
Under you see the back of my card, where you can write a greeting. The card is fasten to a paper straw.
You might see the different layers on the photo under.
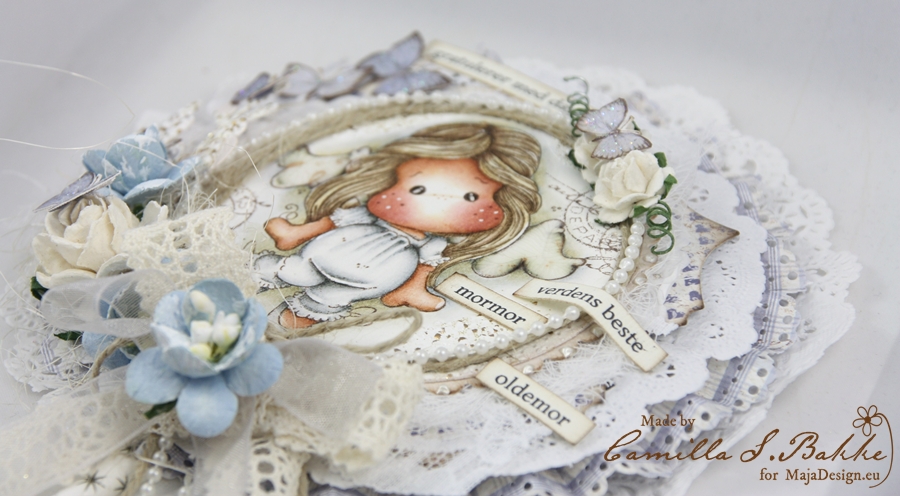
I put the lollipop together with a flower I gave my grandmother on her birthday.
Hope you liked it, and maybe you fell the urge to make one your self!
♥♥♥
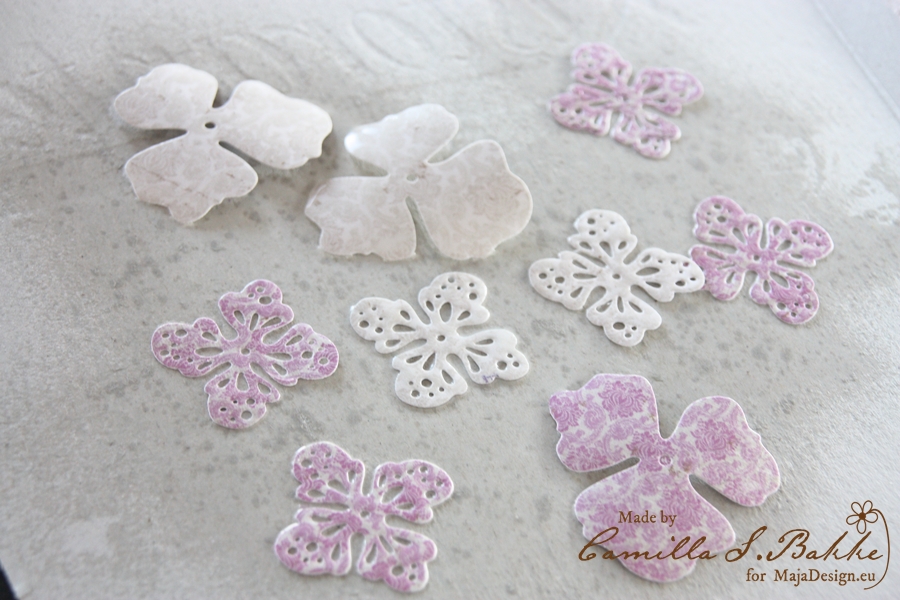
Now I will show you how you can make homemade flowers. I have cut mine out with dies (DooHickeys) from Magnolia. But you can use any flower dies really.

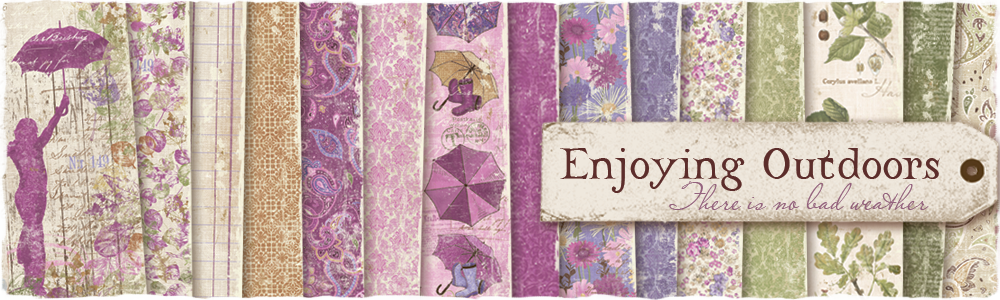
1. Cut out some flowers from your beautiful Maja Design papers. I have used two pattern papers from the Enjoying Outdoors collection, “What a beautiful day” and “Having tea in the sun”.
2. Use a mini mister from Rangers (or something similar), and spray water onto the paper flowers.
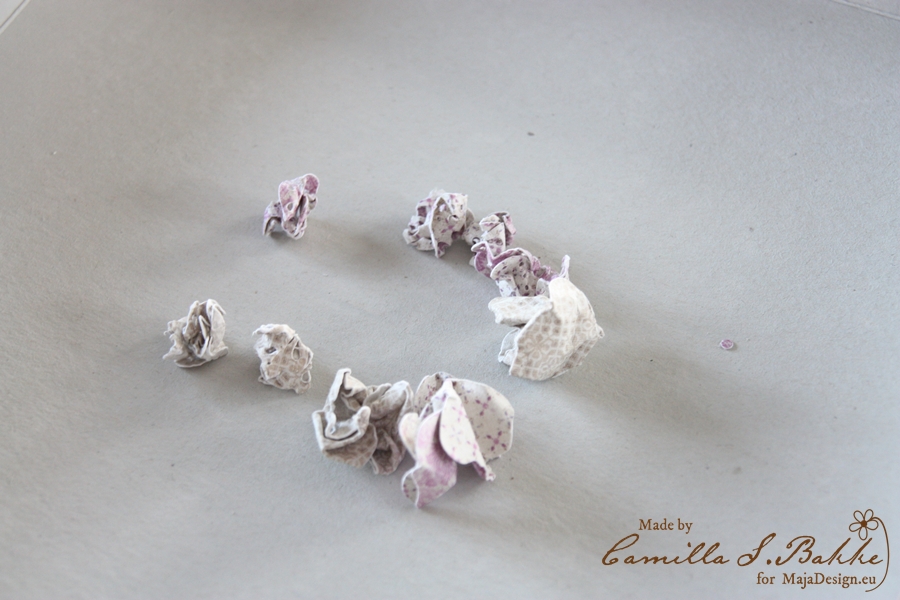
3. Curl the flowers together, and let them dry.

4. Then fold up the flowers.
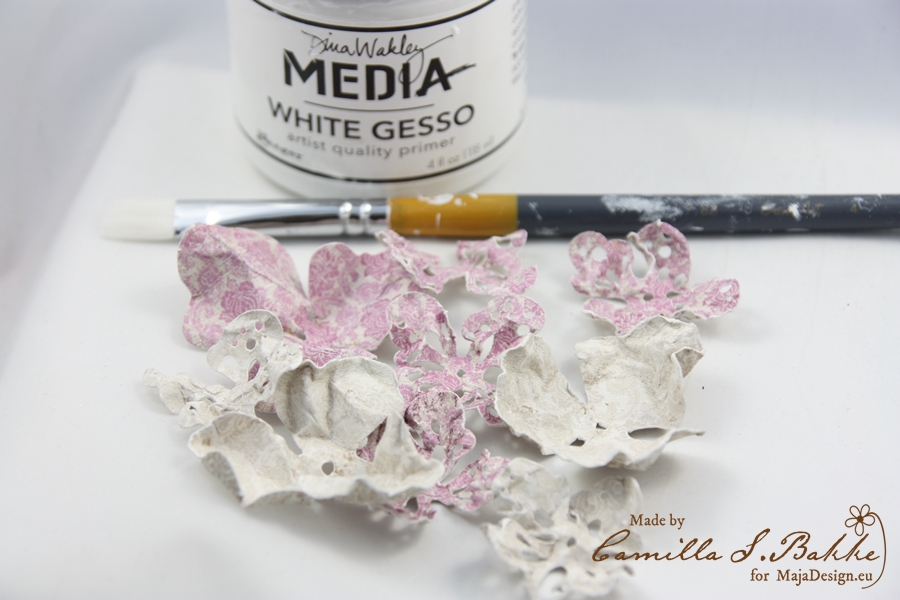
5. To make the look even more shabby, give them a brief stroak with white Gesso.
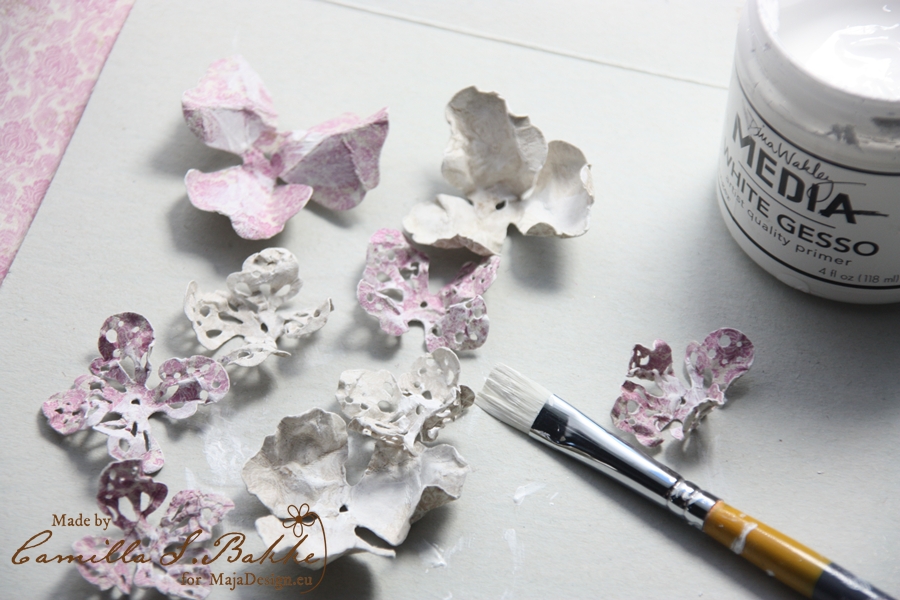
6. Do not paint all of the flowers, let the beautiful Maya Design papers show through.

7. Give the rest of the cut outs a brief stroke with the paint too. As you see it is a bit transparent.
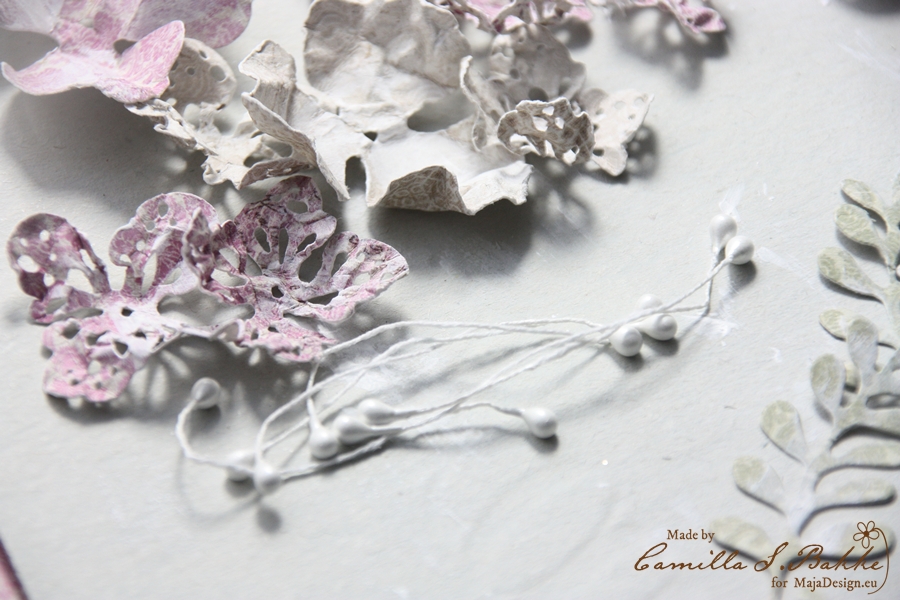
8. Put them together with two stamens (mine are from Wild Orchid Crafts).
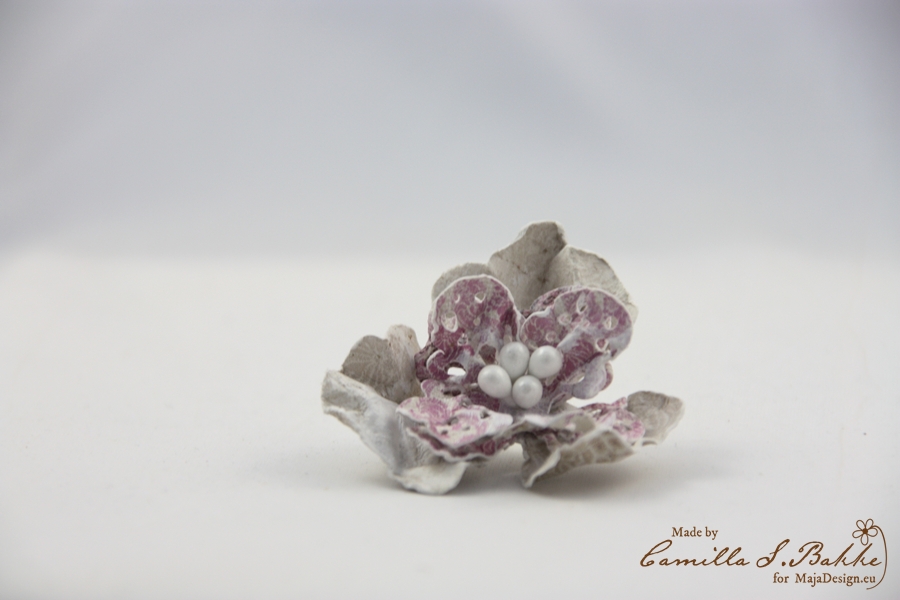
8. One of the flower put together.
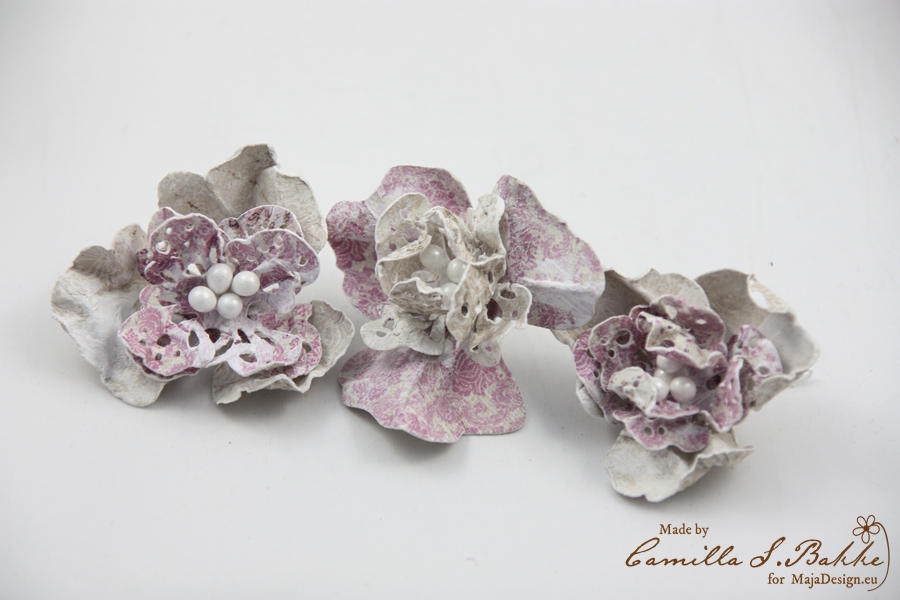
9. All three of them, ready to be used on any project.
♥♥♥
Here is the card I made with the flowers:
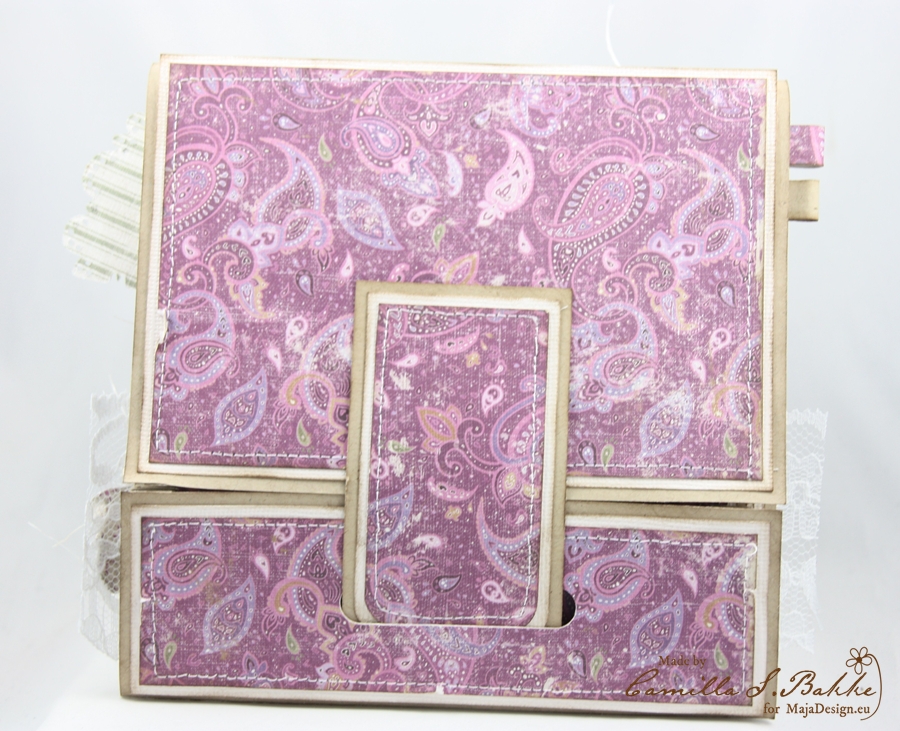
The papers used are from the Enjoying outdoors collection – “Feeling good”. I have used the front side of the paper on the front of the card, and the back side of the paper inside the card. It is a folder card. The image is from Tickled Pink Stamps. And I have coloured her with Distress Ink, re-inkers and Markers.
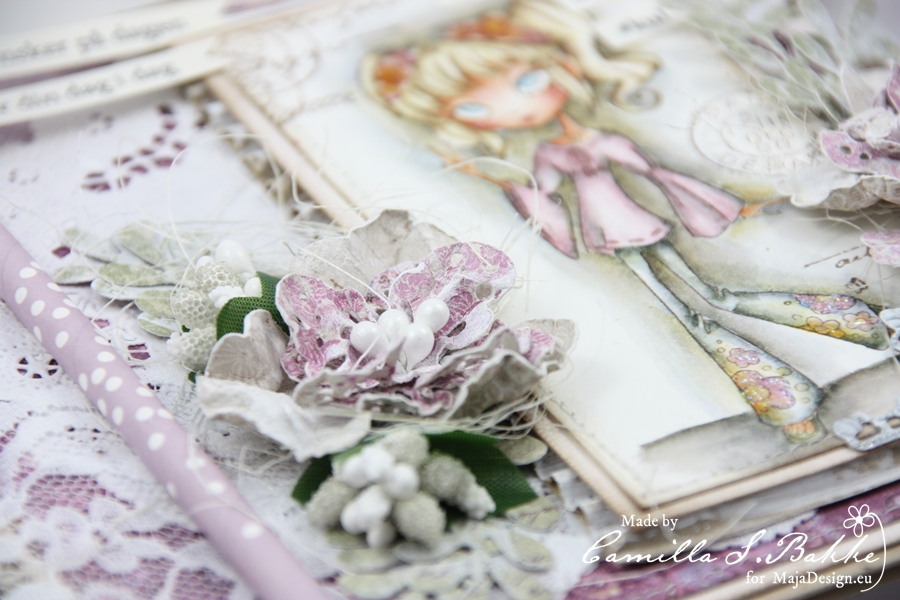
A close up of the home made flower.
And over you can see that I have put together two of them, also with some leaves.

The green paper I have used is also from the Enjoying outdoors collection – “Woodlands”.

The card is folded on 5 cm and 20 cm. It measures 15 x 30 cm. Under you see the back:
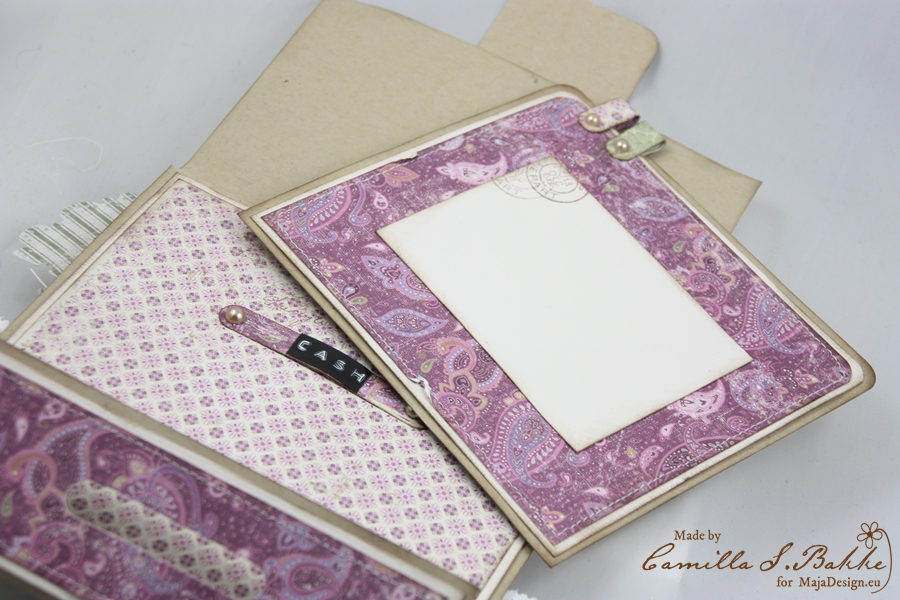
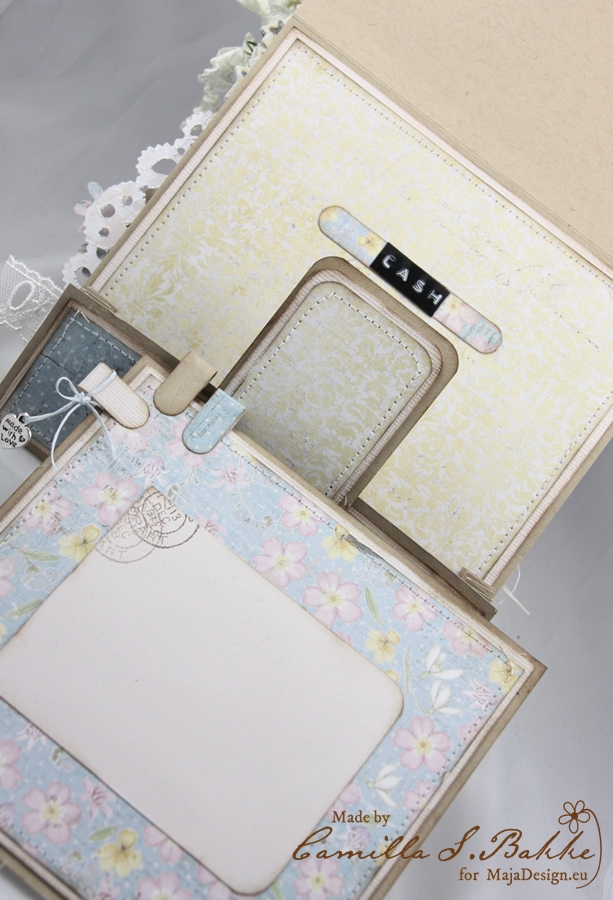
And here is the inside. I have made a tag that you can write a greeting on. Look at the fantastic paper!

And under the “cash”-text you can place the money-gift.
♥♥♥
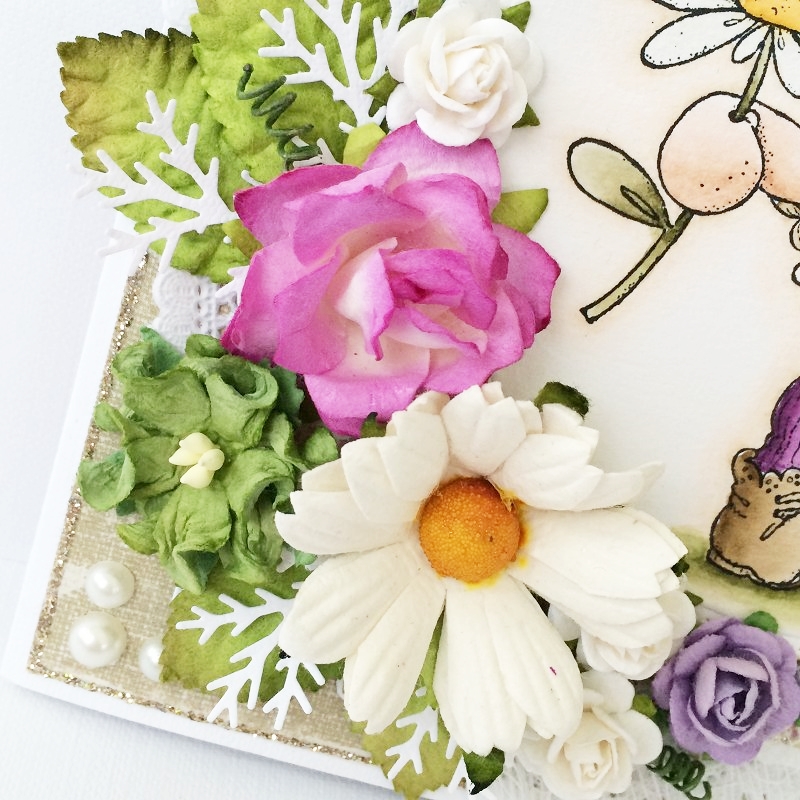
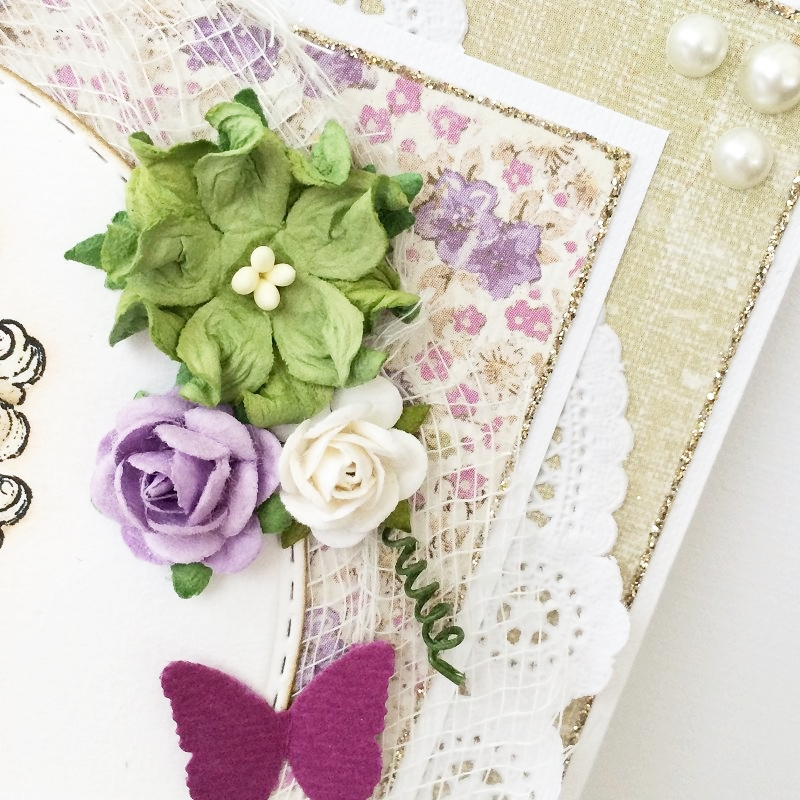
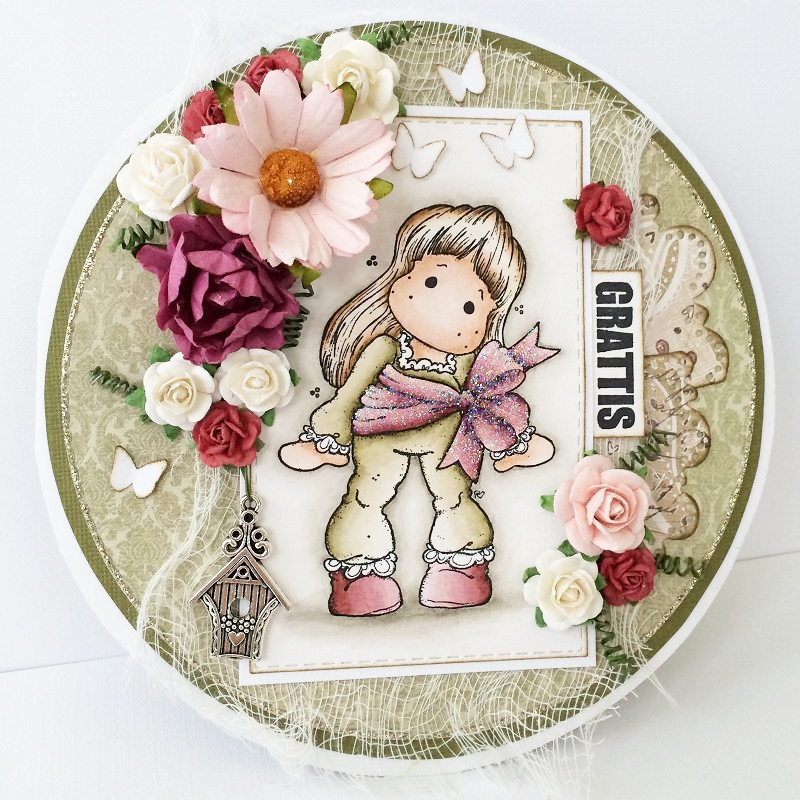
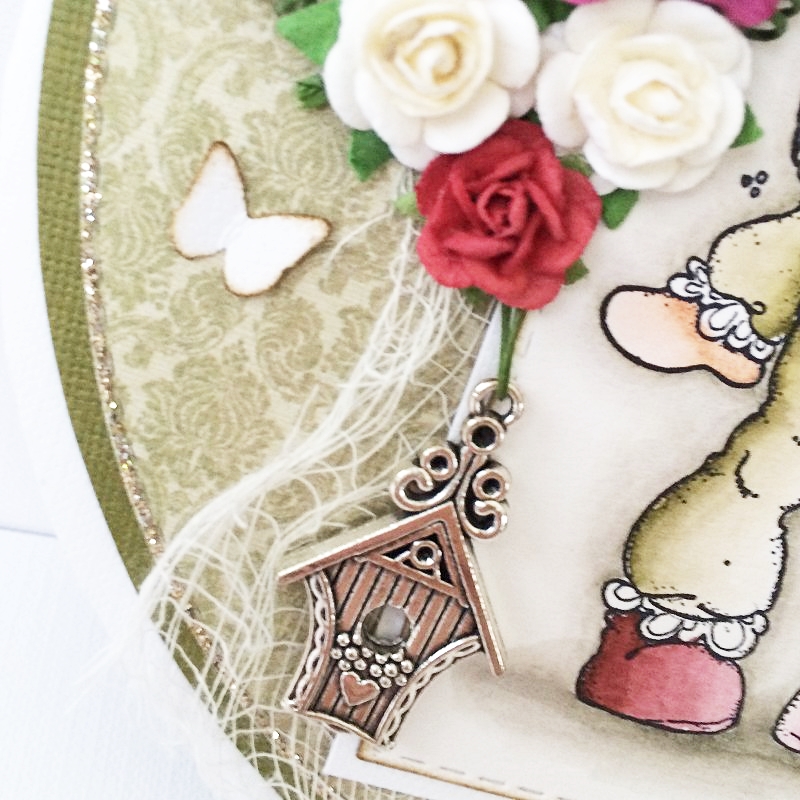
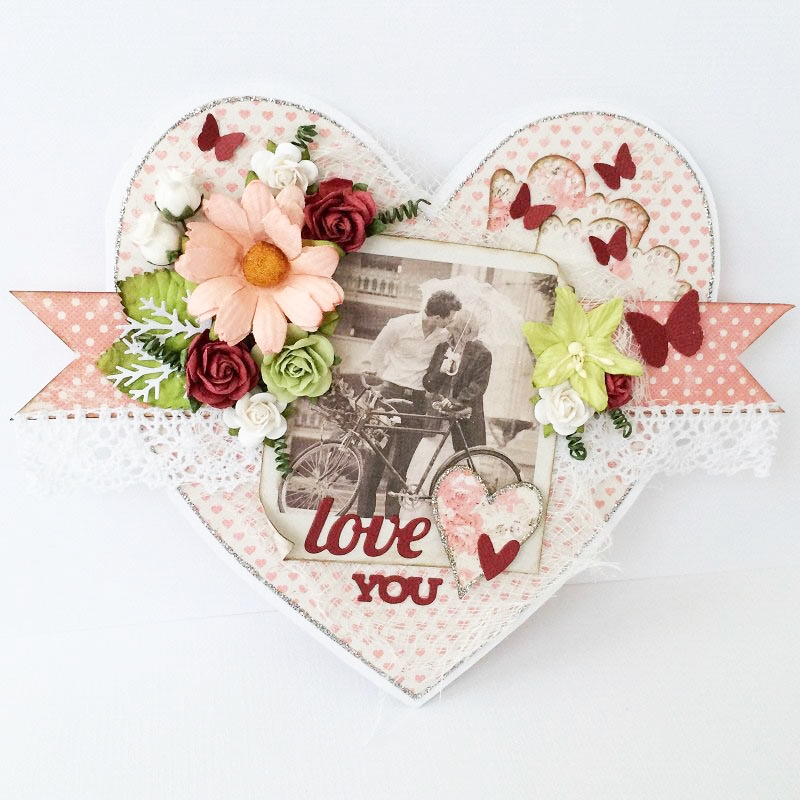
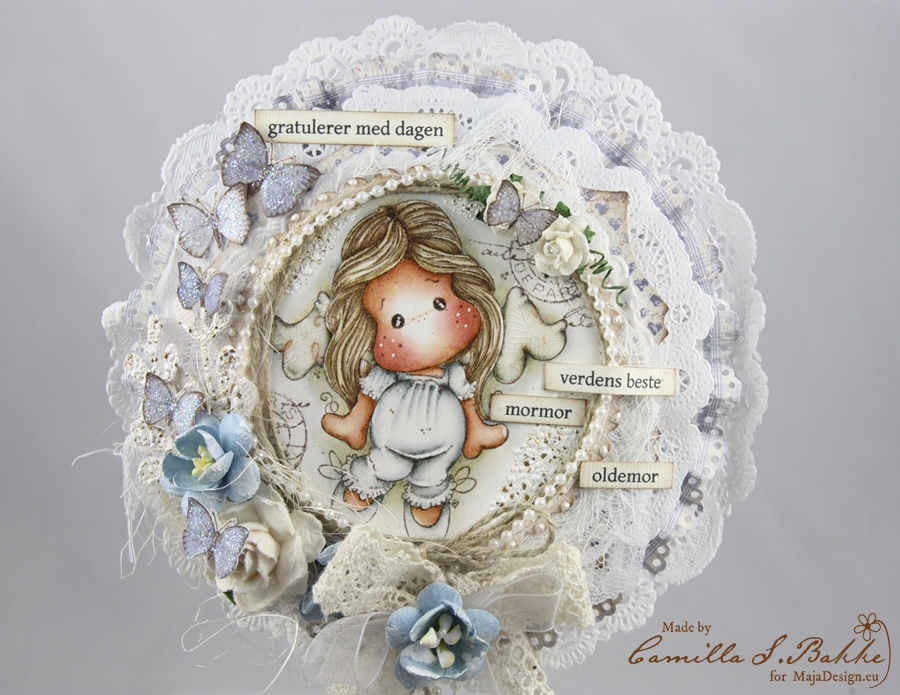
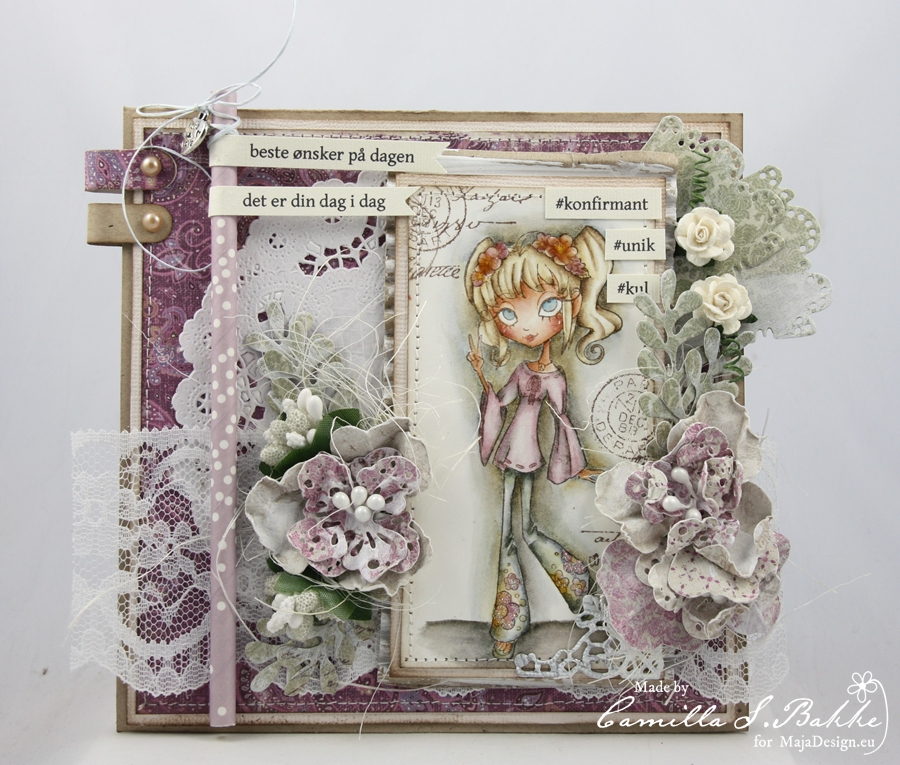
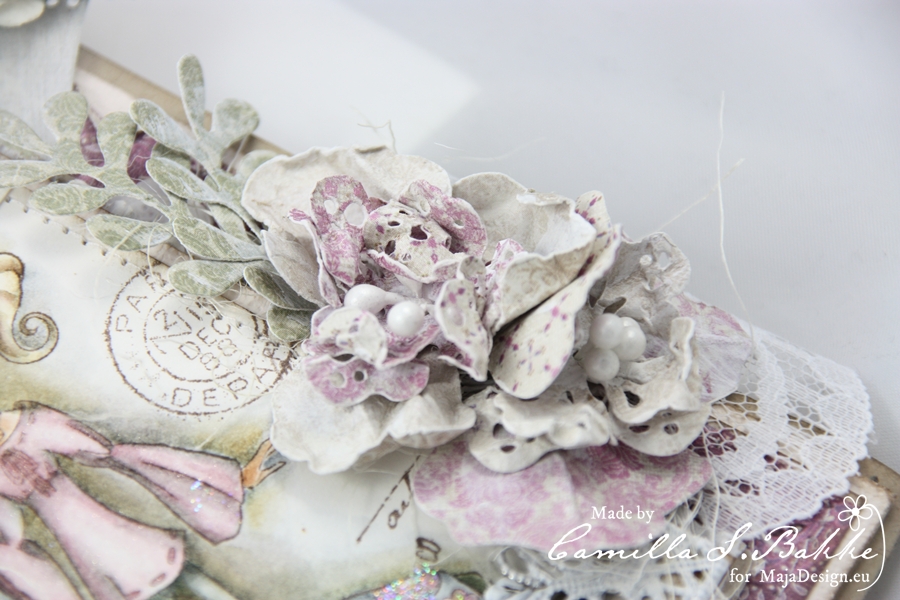
Here is another confirmand card I have made. I have used the lovely papers from the Vintage Spring Basics Collection – “3rd of March” (both sides) and “4th of March”. I have also used Enjoying outdoors – “Woodland” for the leaves.
This image is also from Tickled Pink Stamps, and I have coloured her with Distress Ink, re-inkers and Markers.

The flower is from I am Roses.
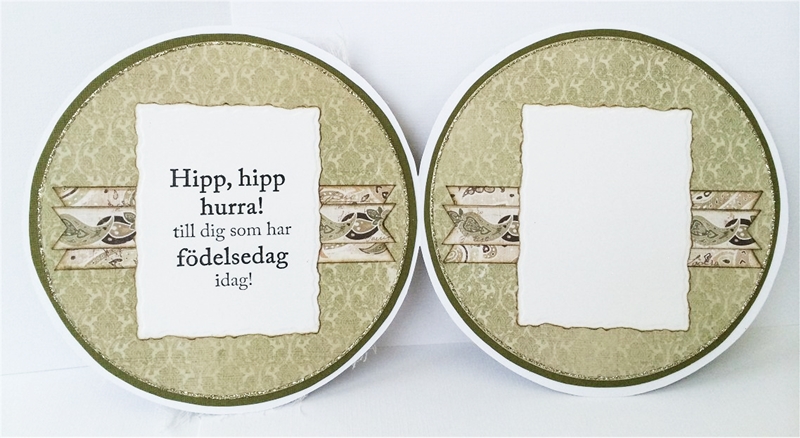
Under you see the back of the folder card.

Here is the inside with the tag/card to write on.
♥♥♥
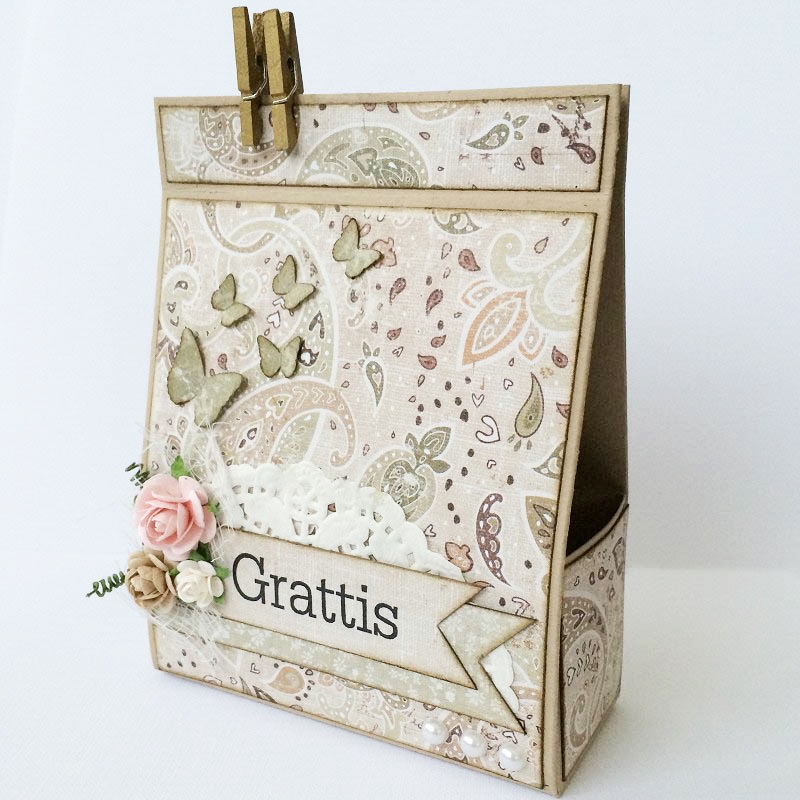
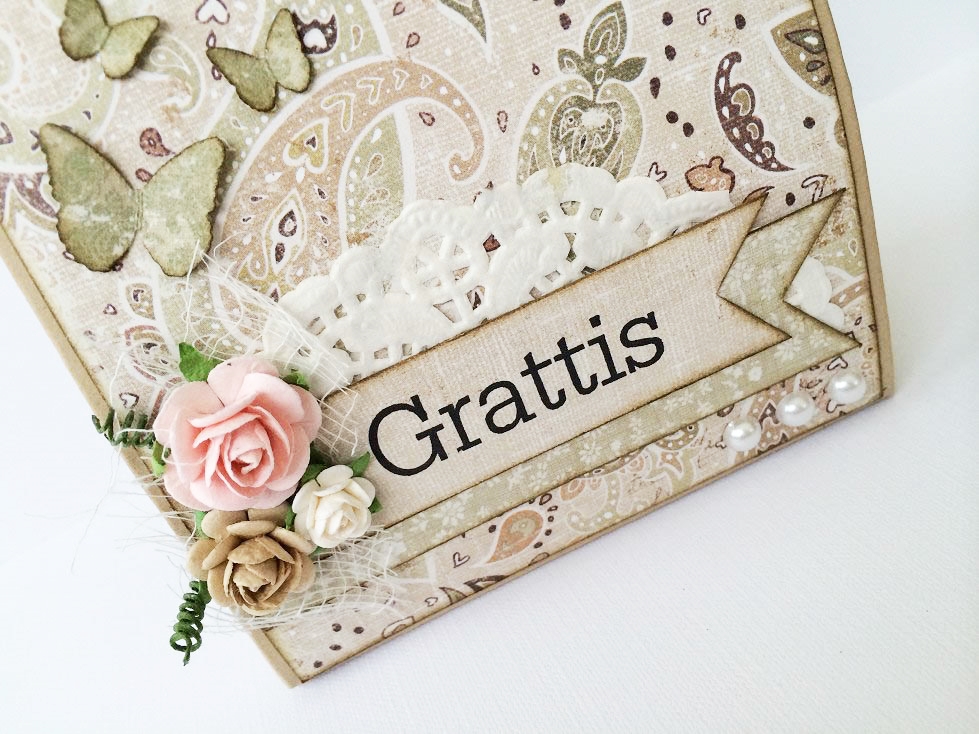
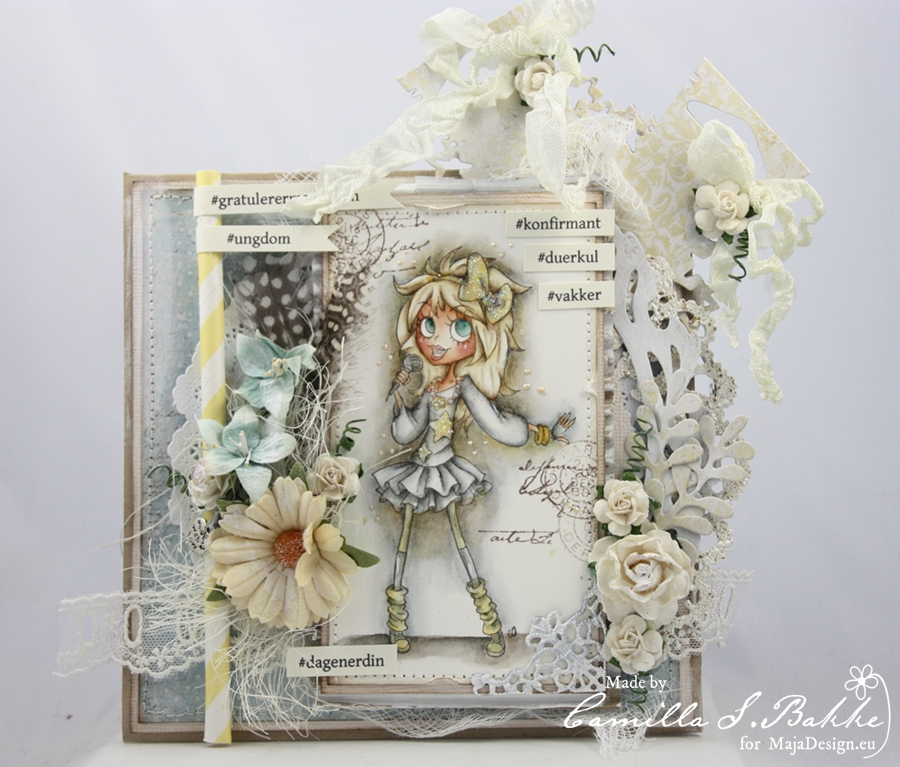
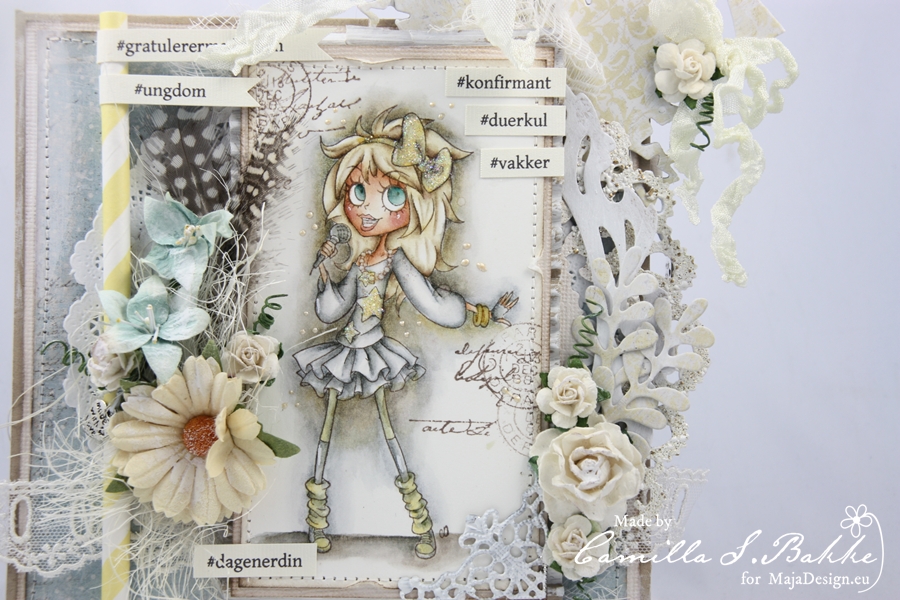
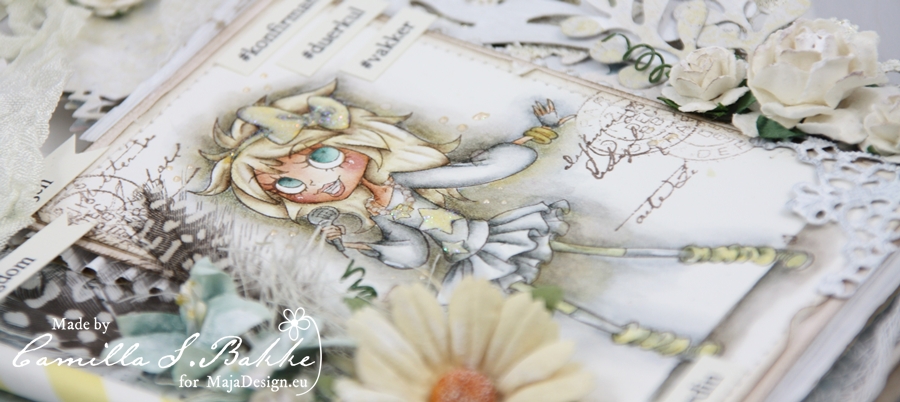
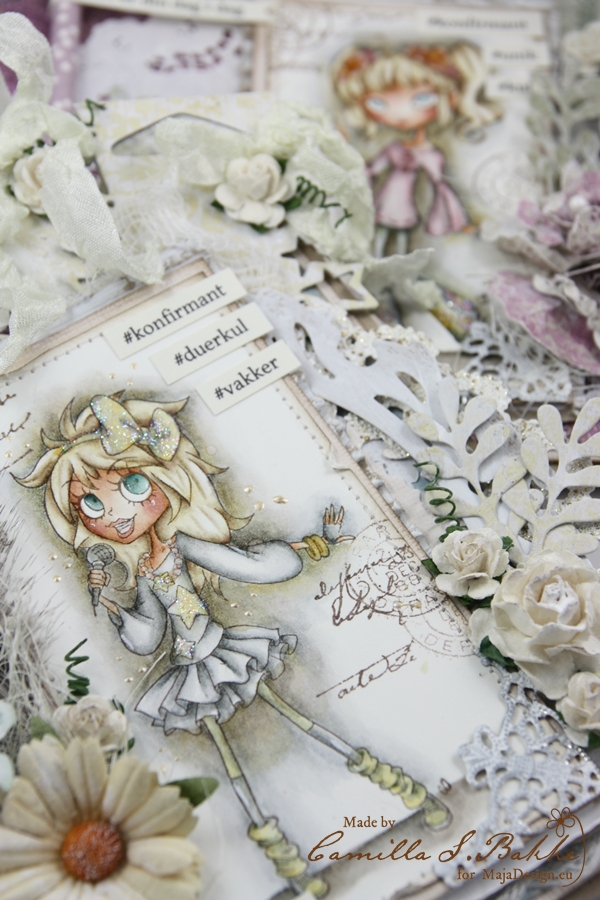
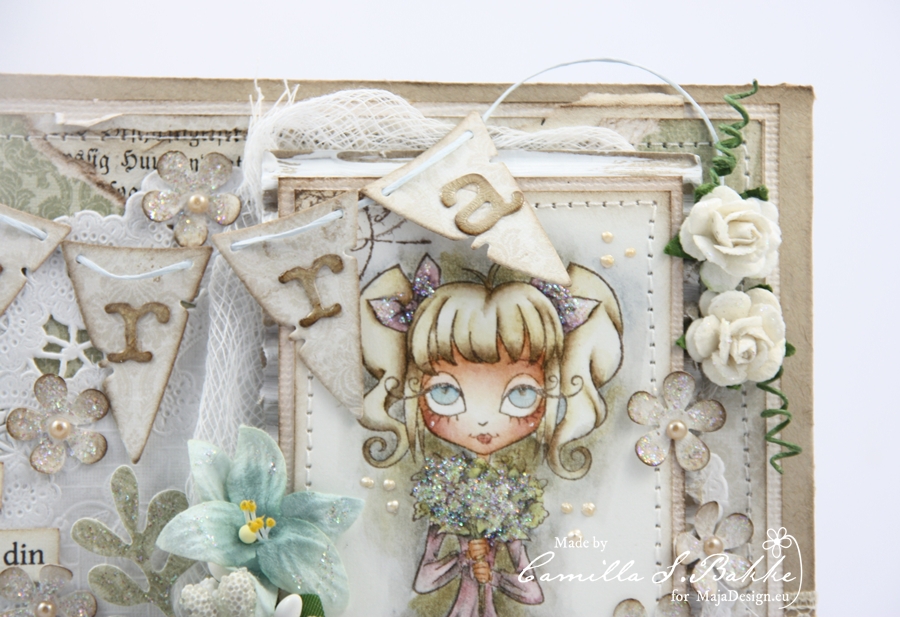
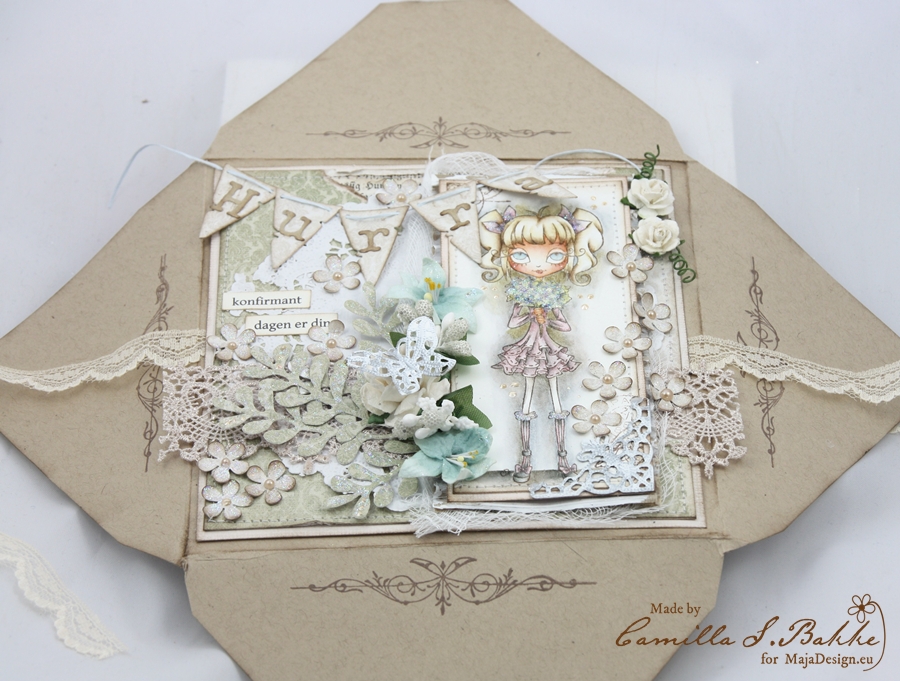
Here comes my last confirmand card. Also with a Tickled Pink Stamps. The papers are from the Enjoying Outdoors collection – “Woodland” and “Having tea in the sun”. I have also used a page from an old book, and placed between the two patternpapers. You can spot it on the upper part of the card.
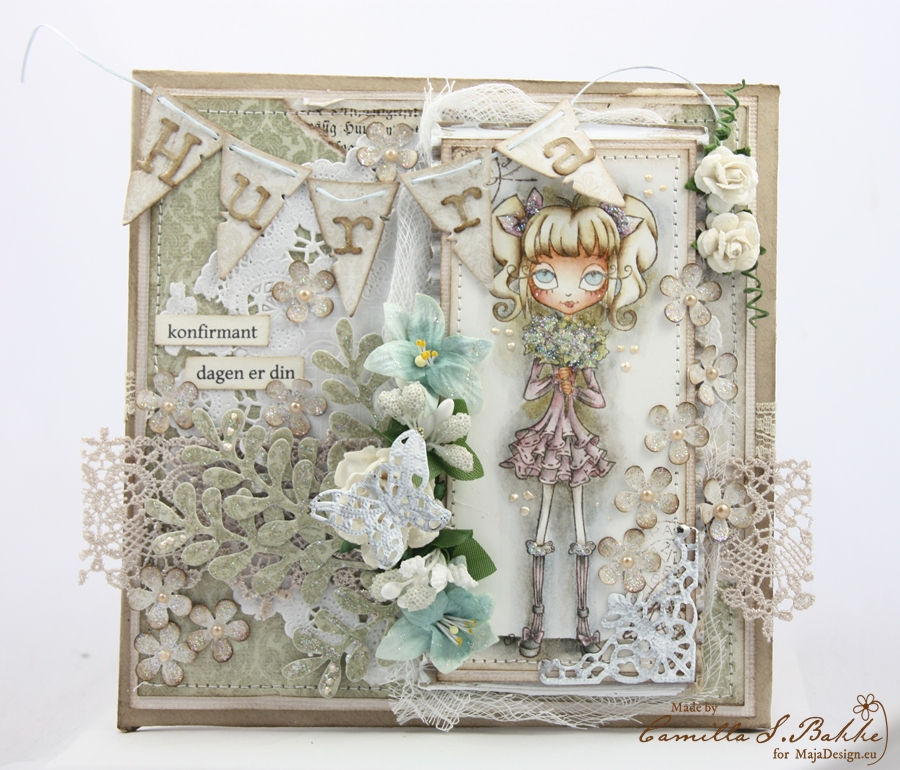
Also this image is coloured with Distress Ink, re-inkers and Markers. The small flowers are punched out with a Retro Flower punch (small). I have added Stickles – Star Dust on to them. The leaves are cut out with a DooHickey die from Magnolia.
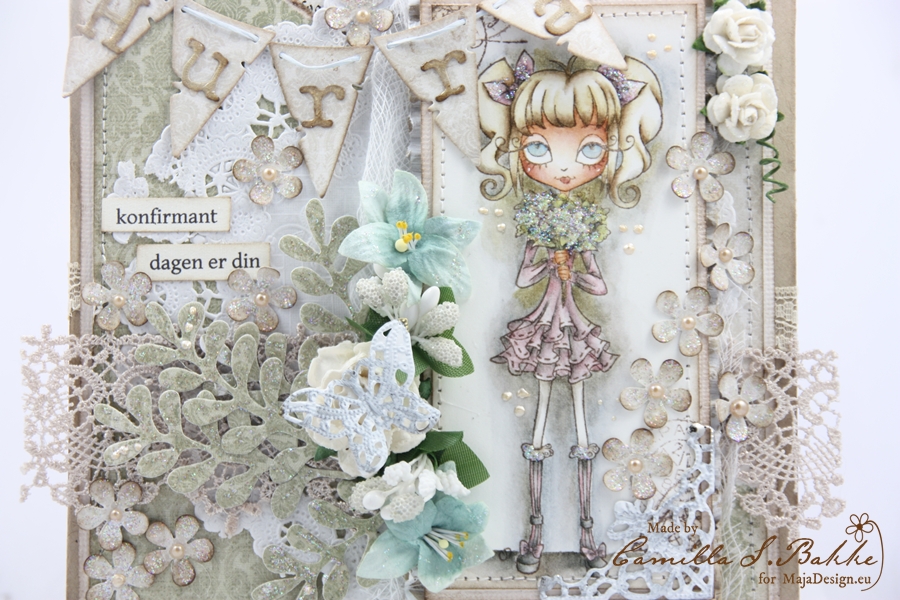
I have added Stickles – Star Dust onto the flowers, and spots of Liquid Pearls around the image. On the letters “Hurra” I have attached Crackle Accents.

The small flowers are punched out from the paper called “Having tea in the sun“.
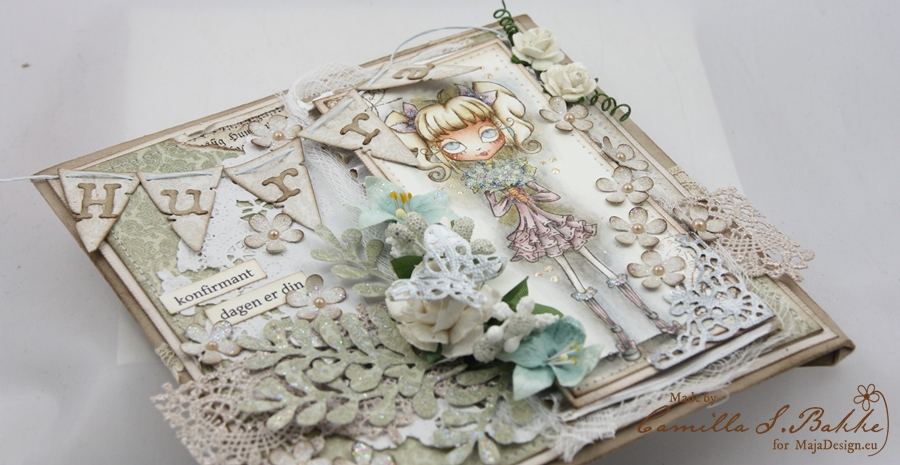
The metal corner and the butterfly are painted with White Gesso.
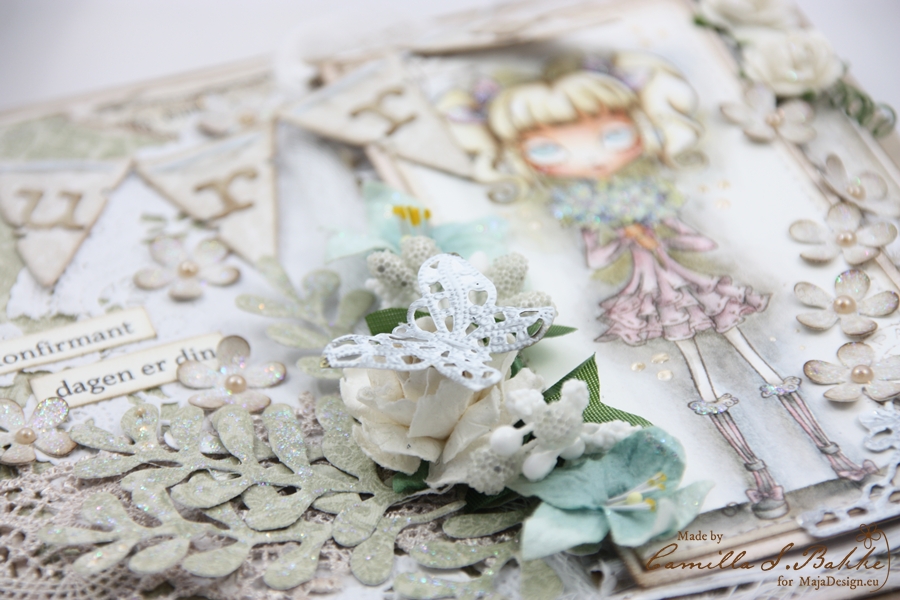
The pennant is made with a DooHickey die from Magnolia, and the letters are made with a Sizzix die.
The shape of the card is made with a Envelope Art from Dutch Doobadoo.
The swirl stamp is from Stempelglede.
♥♥♥
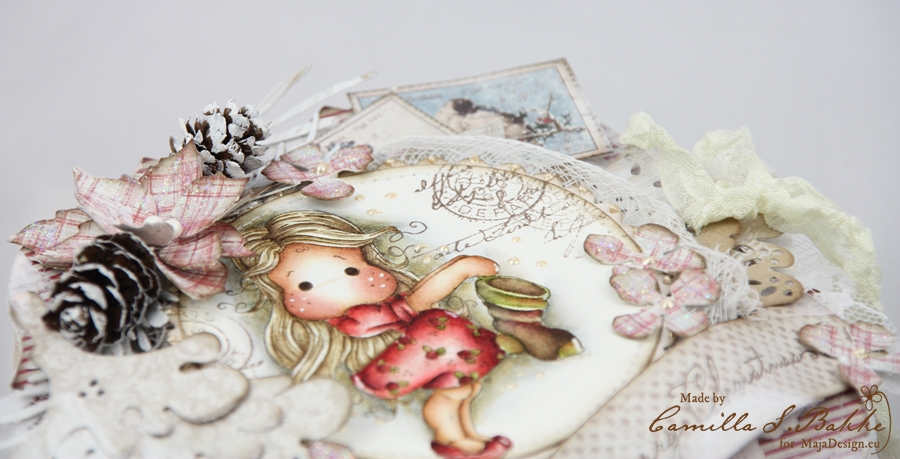
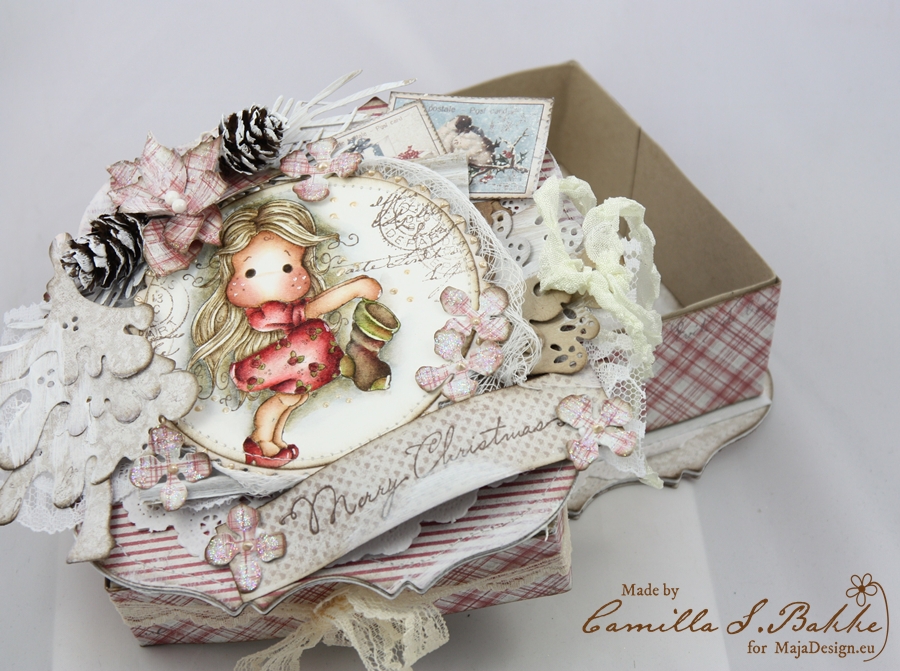
At last I have made a Christmas gift box for you. I just love the Christmas papers from Maja Design, and this collection is no exception. It is called Home for the Holidays. I have used the papers called “A real fellow bs“, “Brought you a gift bs“, “Diecuts” and “Together“.

For the shape I have cut out hard cardboard with a GoKreate die. Then I also cut out (with scissors) two rectangles measuring 10 x 10,5 cm. One for the bottom and the other one for the lid. The box is four cm high. (The lid is three cm high).

The cute Christmas girl is from Magnolia, and I have coloured her with Distress Ink, re-inkers and Markers. The red colour is both Fired Brick and Aged Mahogany.
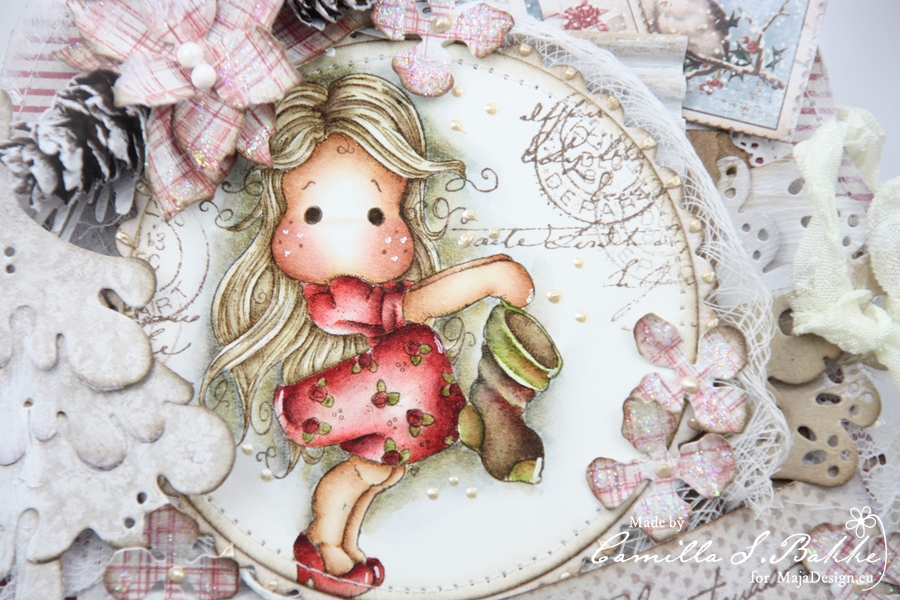
The flowers are cut out from the sheet called “A real fellow“, and I have used Magnolia DooHickeys. The post mark stamp is from Stempelglede.
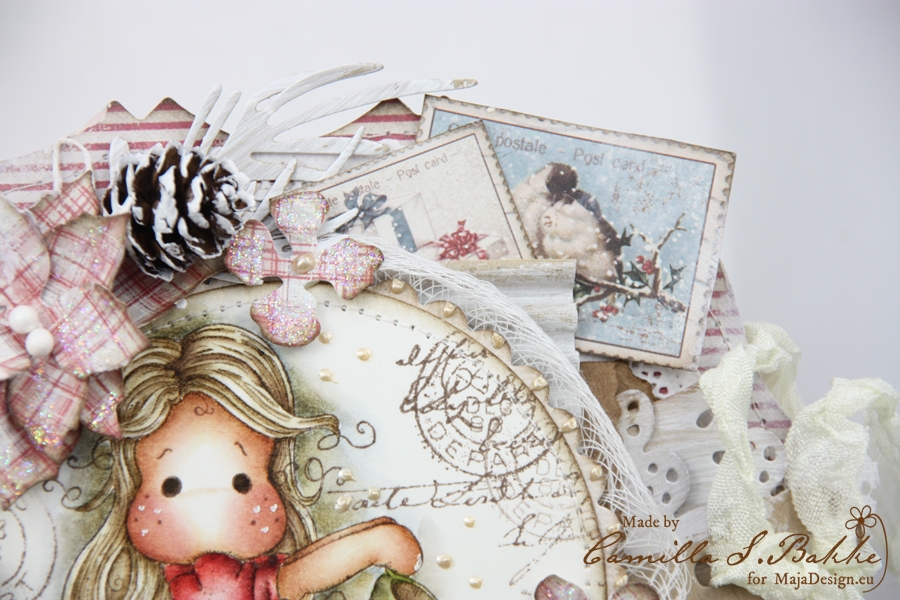
The post stamps are cut out from the sheet called “Diecuts“.
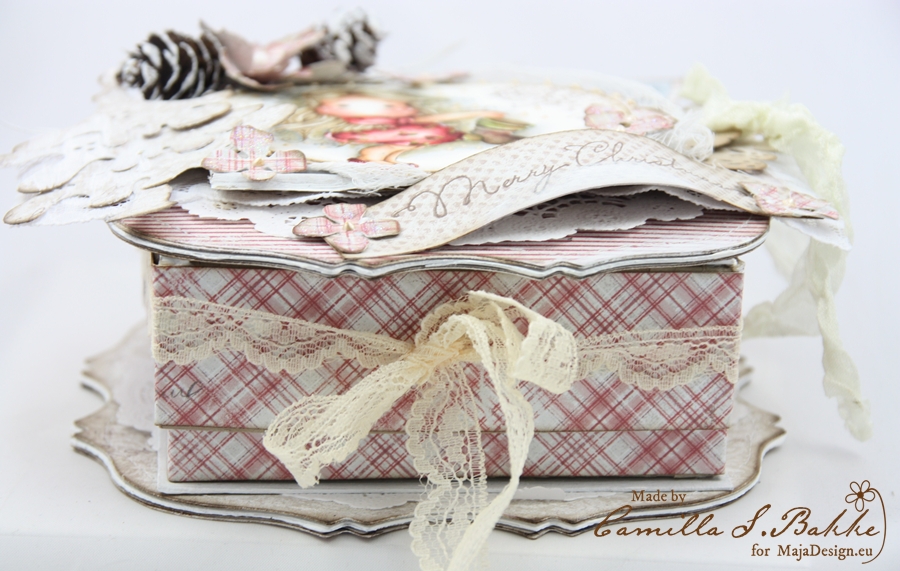
You can see the different layers. Under each pattern papers I also have a Bazzil paper – Vanilla. I sew them together with a sewing machine.
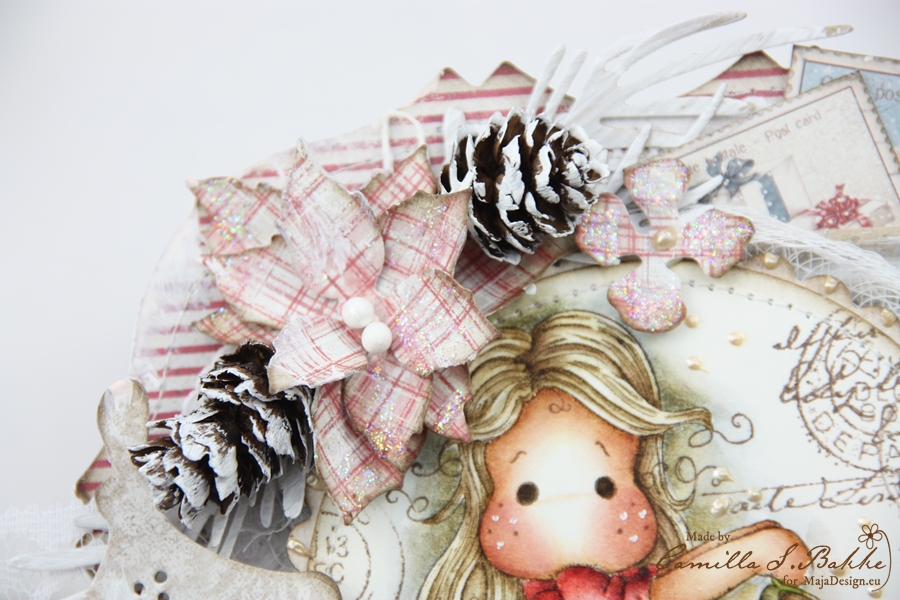
The small pinecones are coloured with a stroke of White Gesso.
The tree is made with a DooHickey, and cut out from the “Together” paper.

Behind the image I have cheese cloth, currugated paper and a mini bag with two cute tags (DooHickeys). I have attached Vintage Seem Binding on the tags. They are first wet with water, then curled up and left to dry.
Thank you so much Camilla and Marie for having me as your guest for March!! It has been so much fun!
If you want to see more creations with Maja Design papers, please visit my blog “Camilla’s blogg“.
Hope I inspired you a little today.
With love,