An Easter Garden!

6

Posted by Nancy Dynes

21 March, 2017 - , ,

Write a comment

A 1

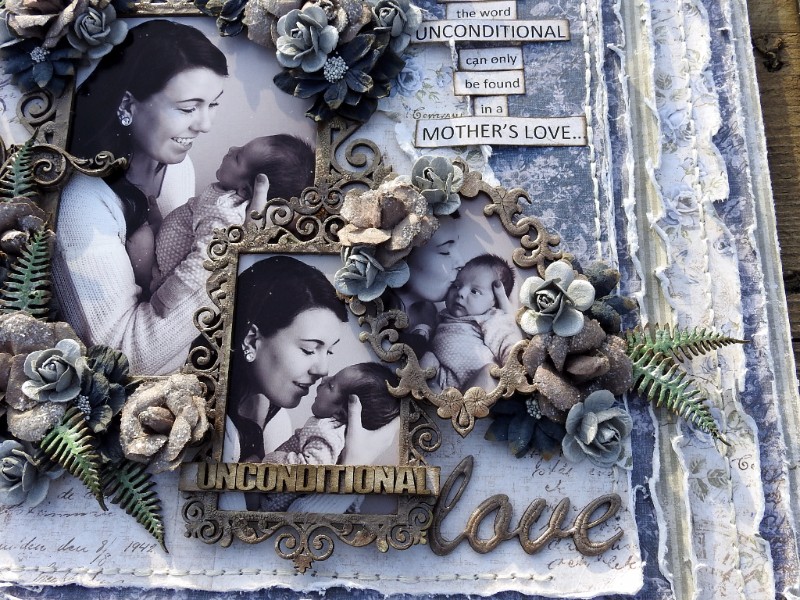
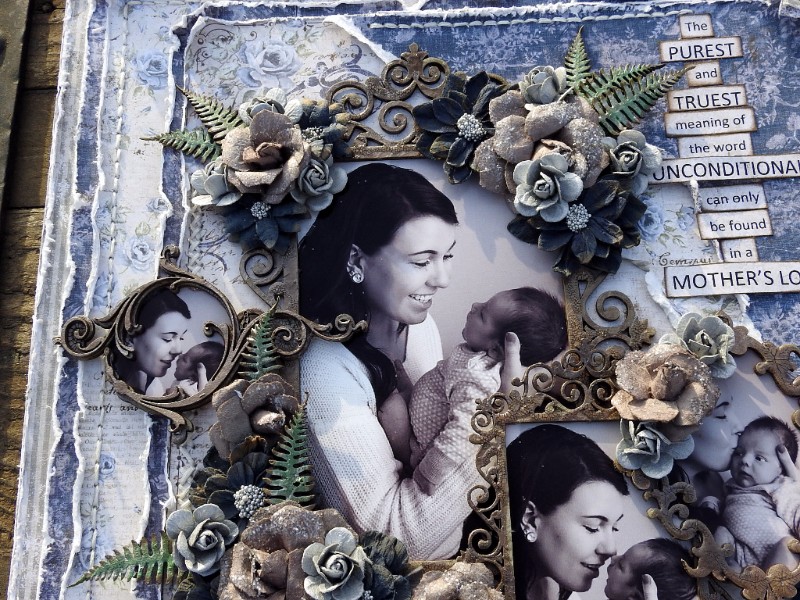
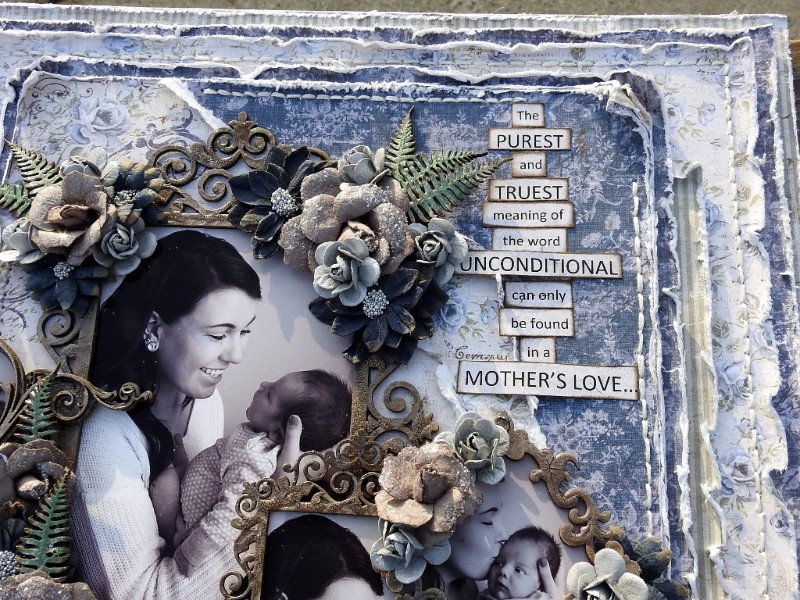
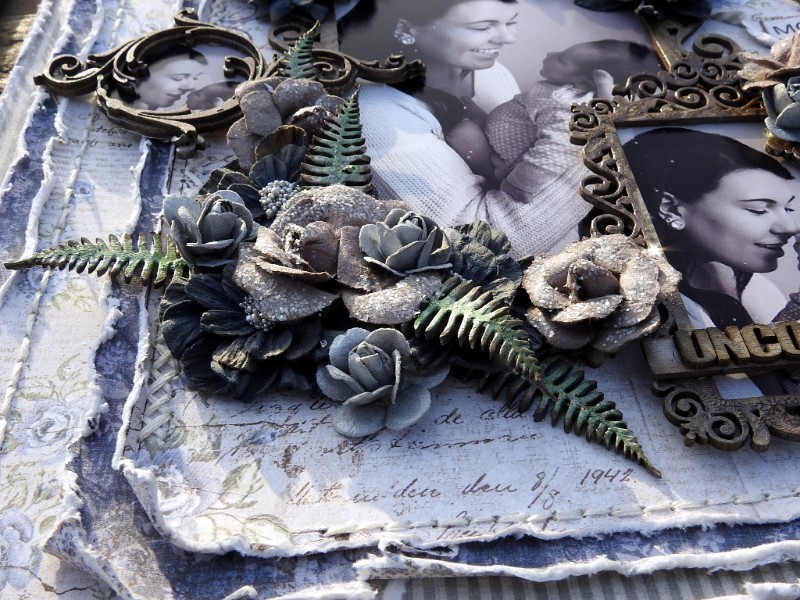
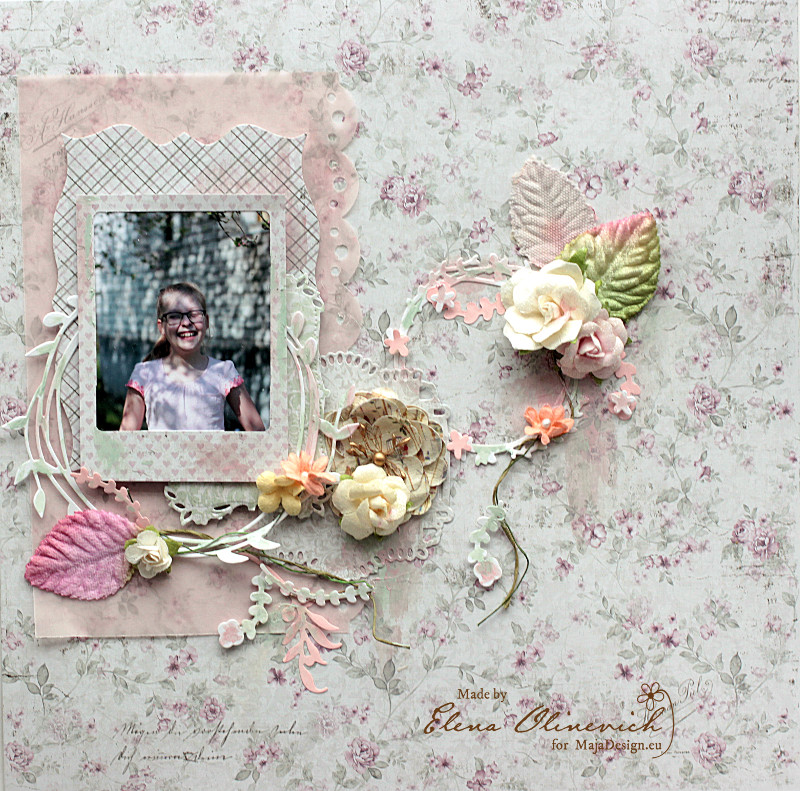
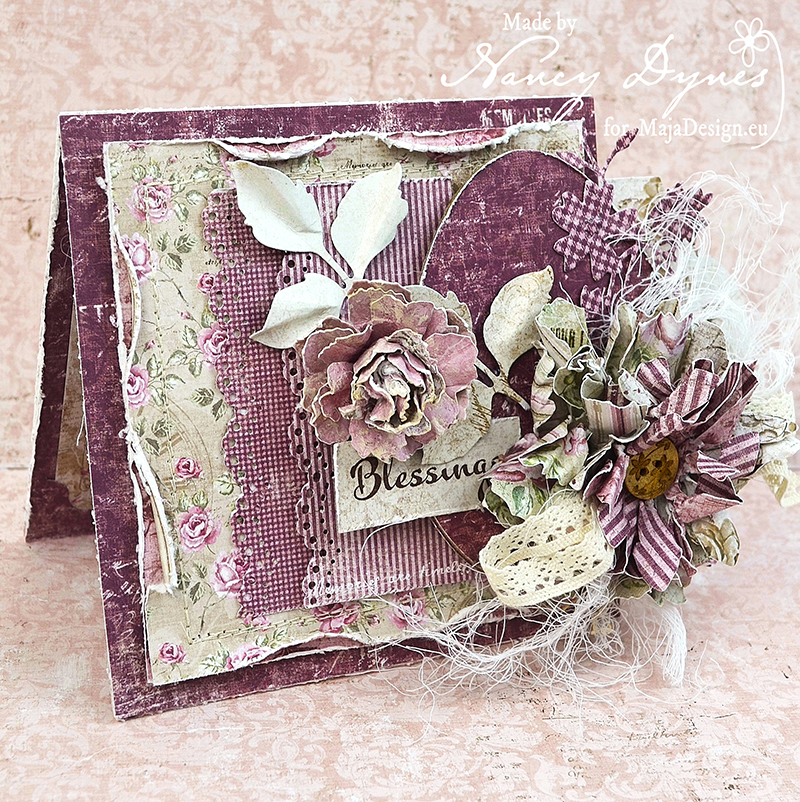
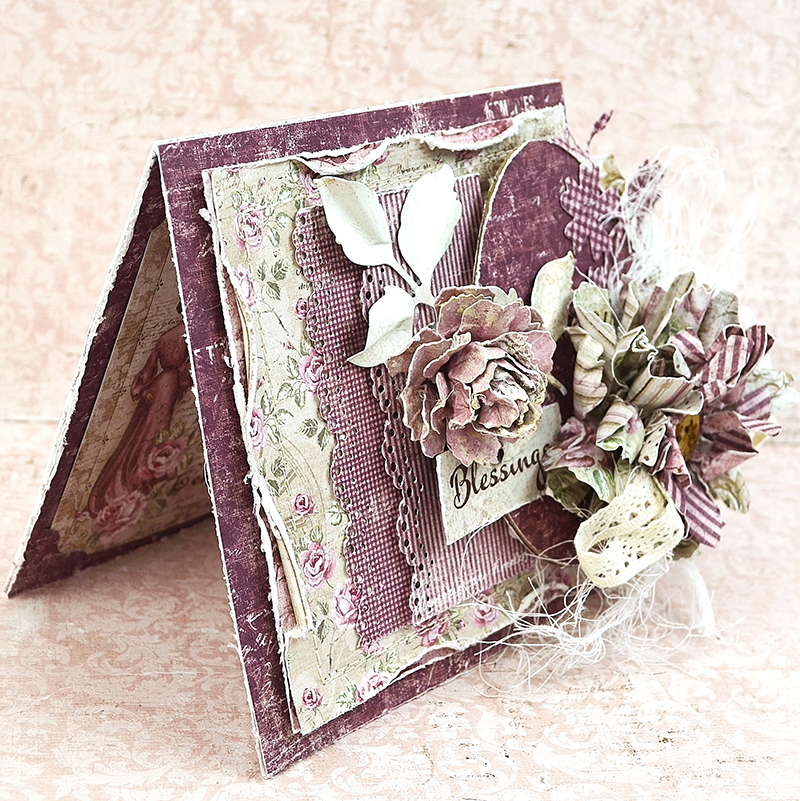
Hello, friends! I hope you’re enjoying a lovely day. It’s Nancy, and I’m thrilled to welcome you to the Maja Design Blog. I’m relishing the beautiful weather and staying busy as ever in my craft room with my Easter preparations. I have a new card to share featuring two spring elements, Easter eggs and handmade flowers.

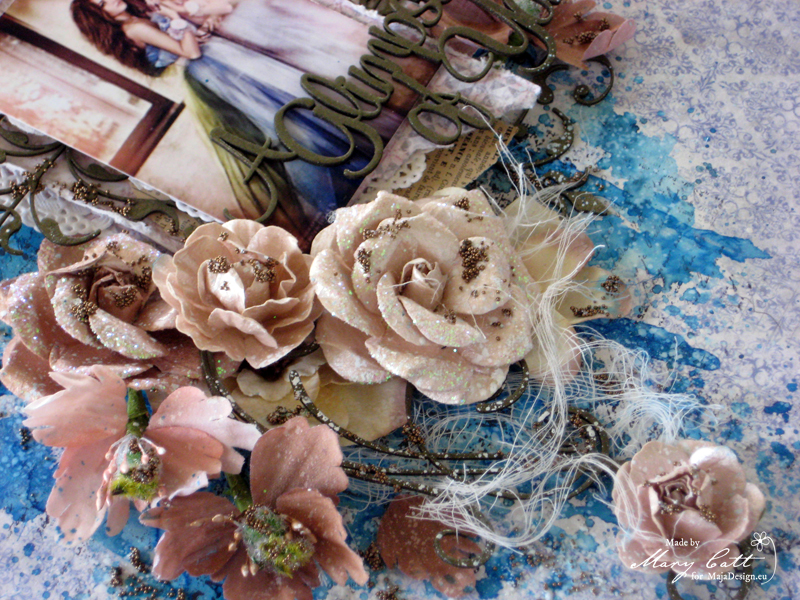
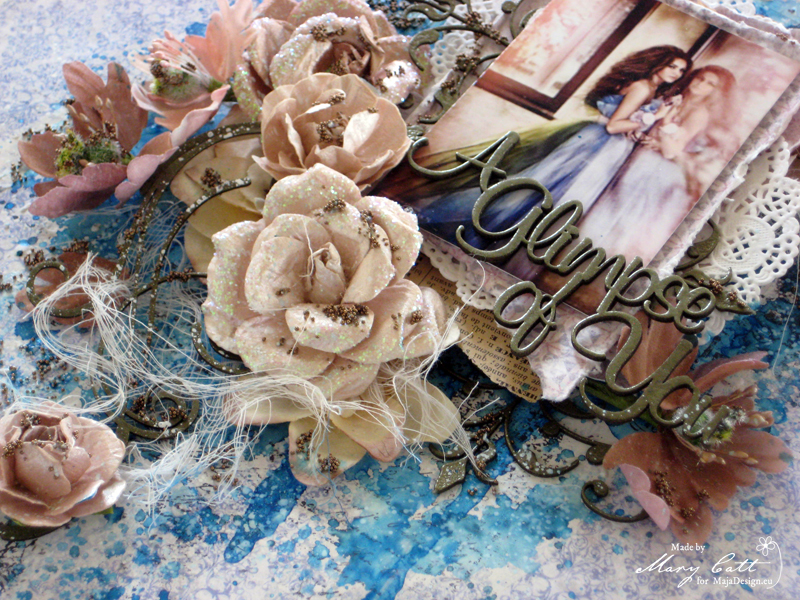
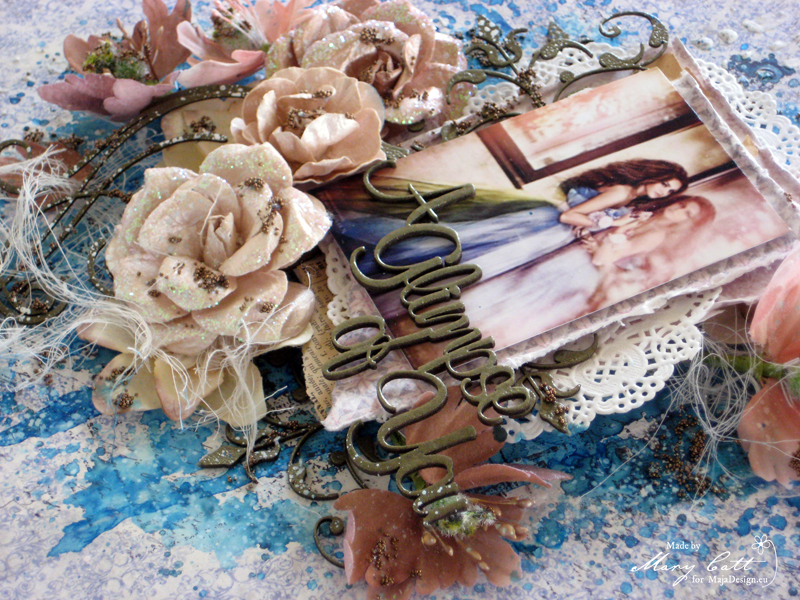
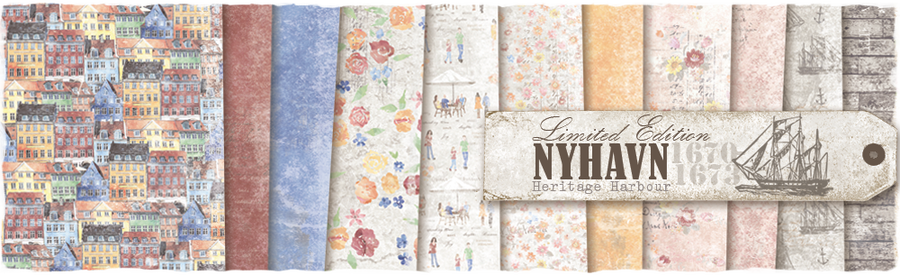
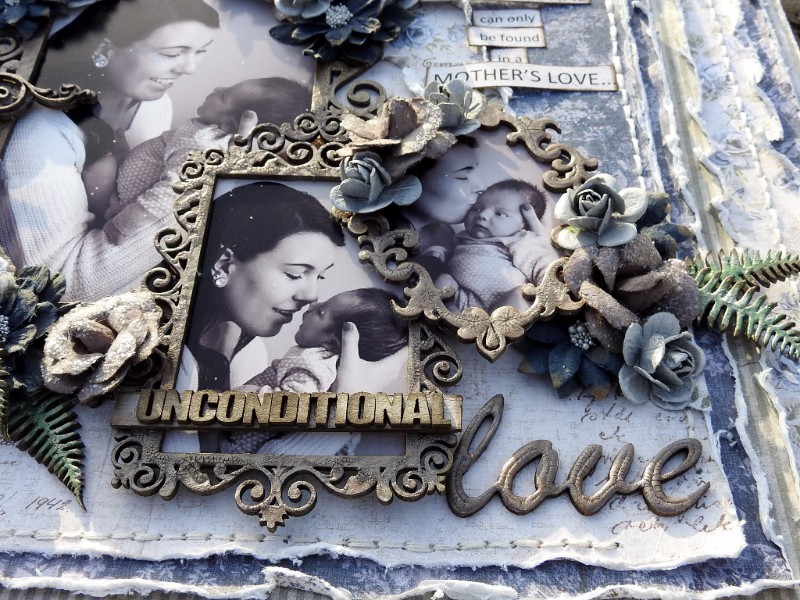
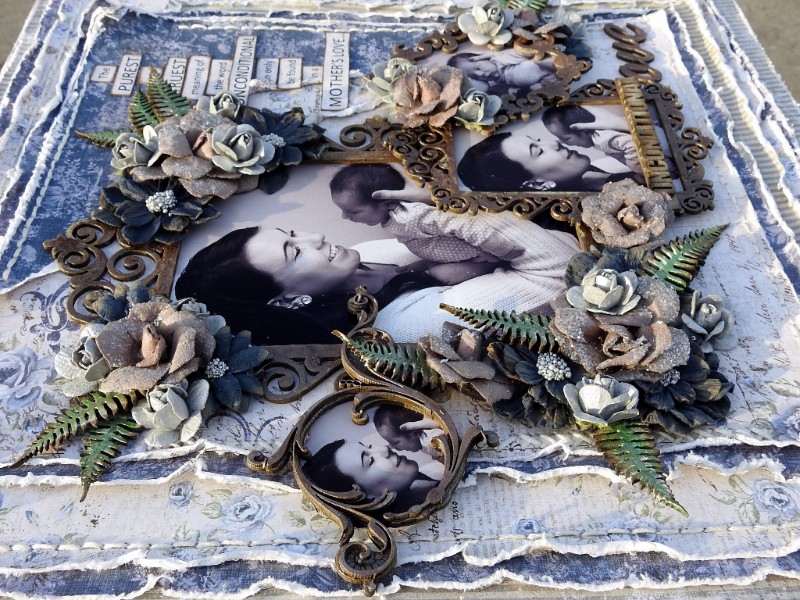
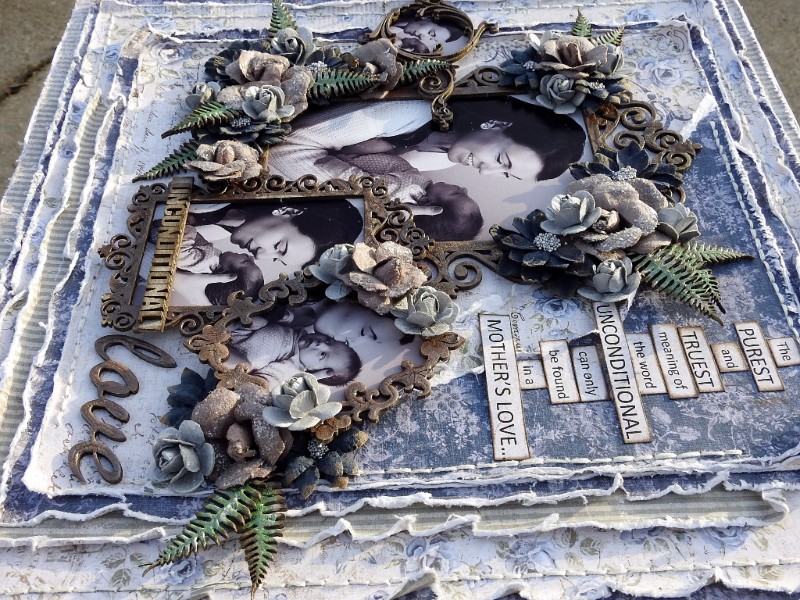
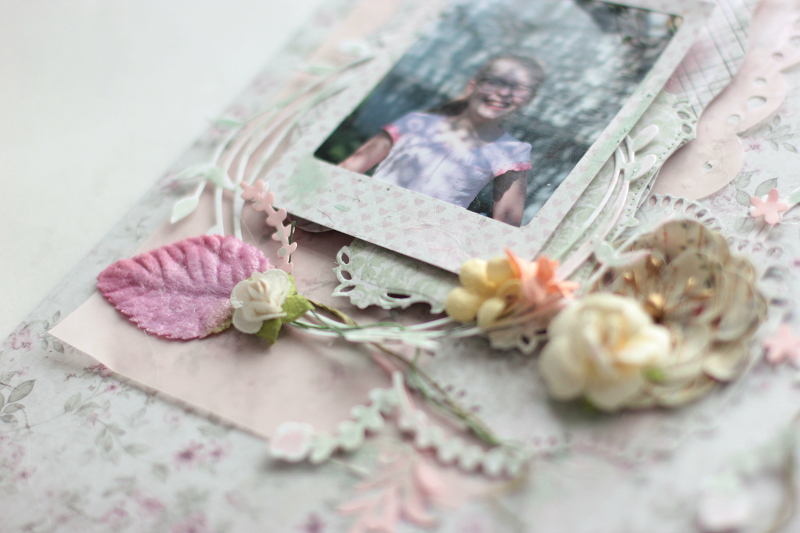
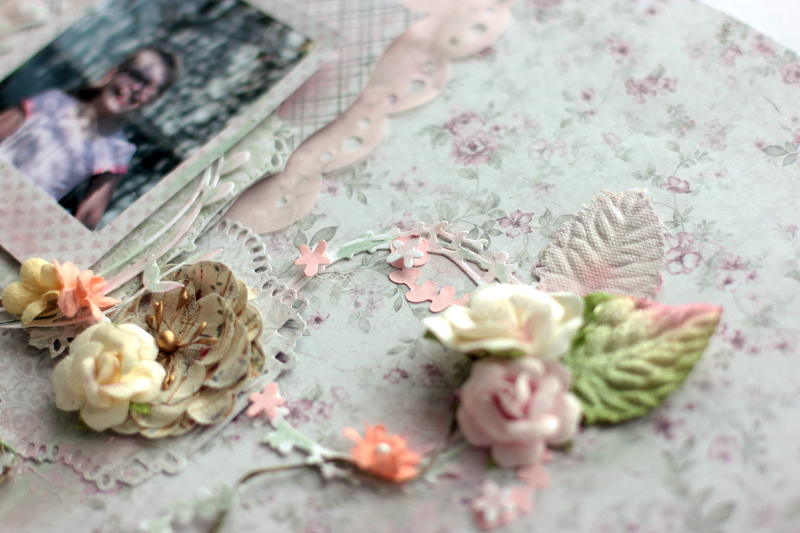
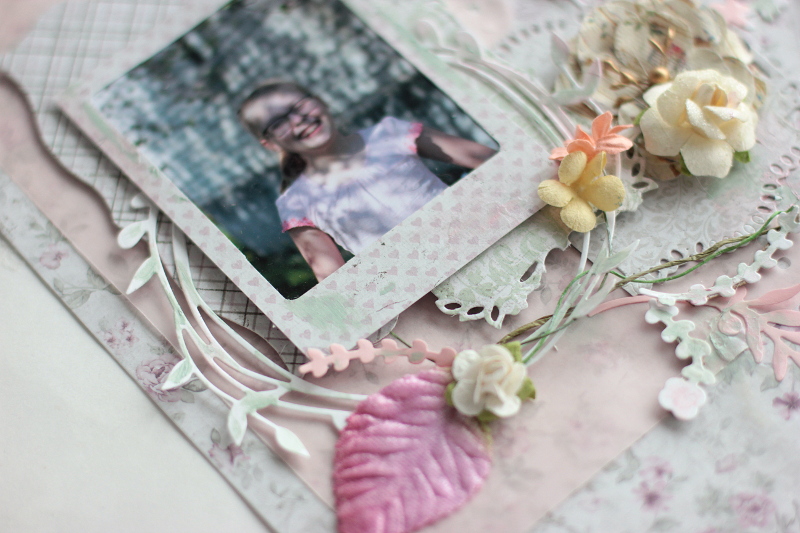
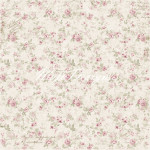
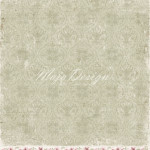
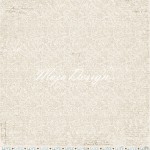
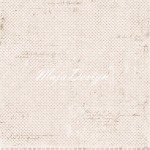
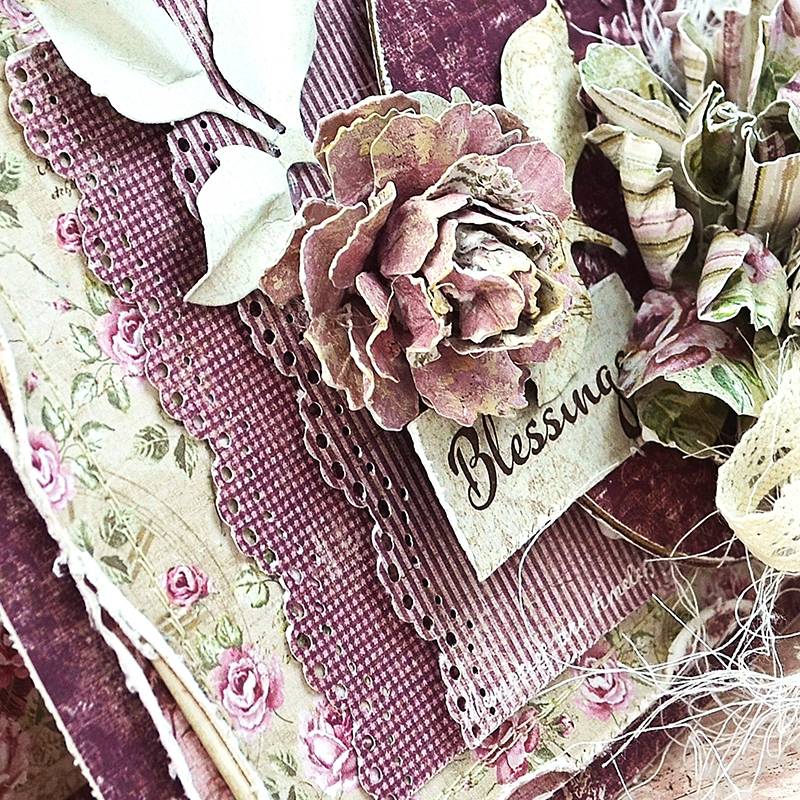
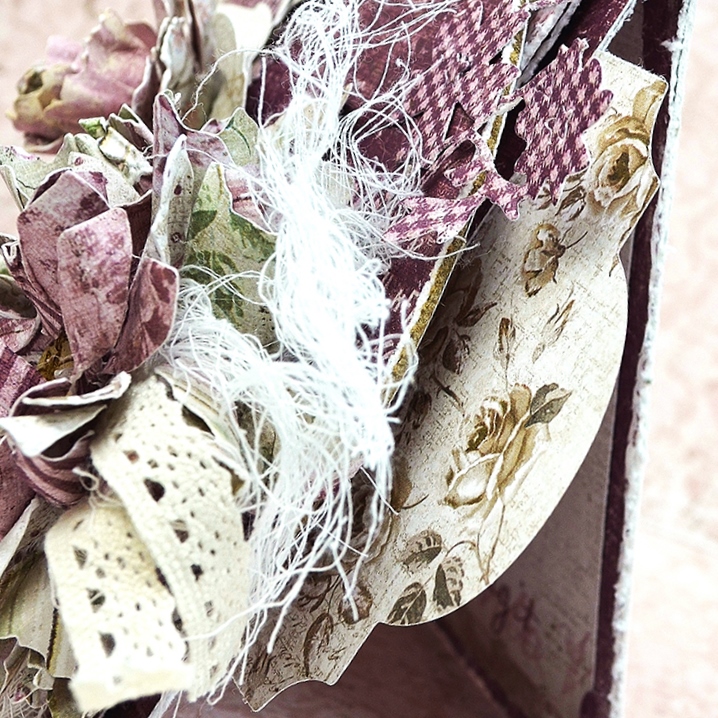
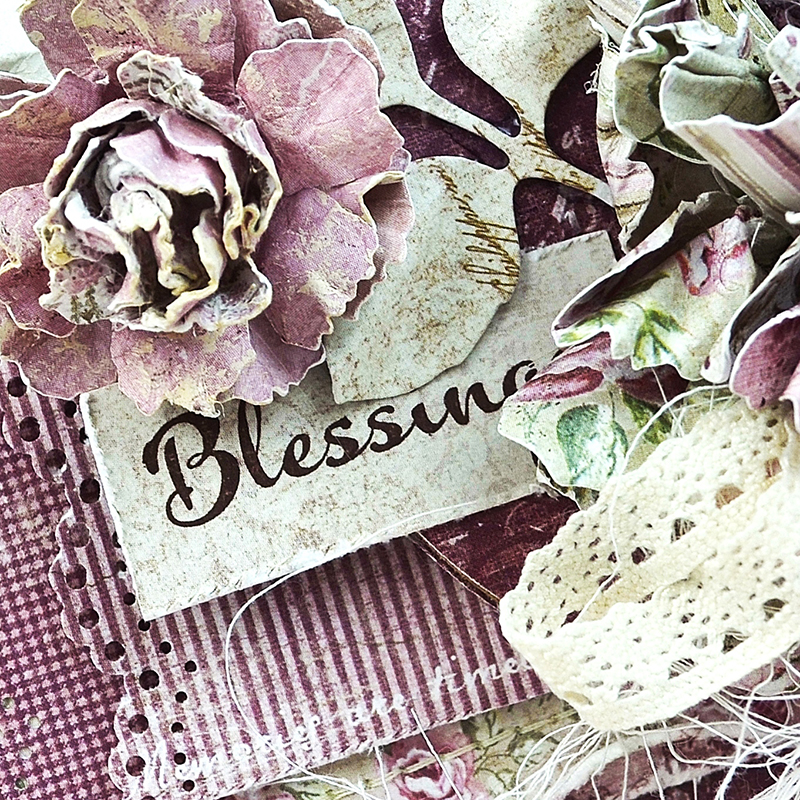
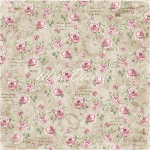
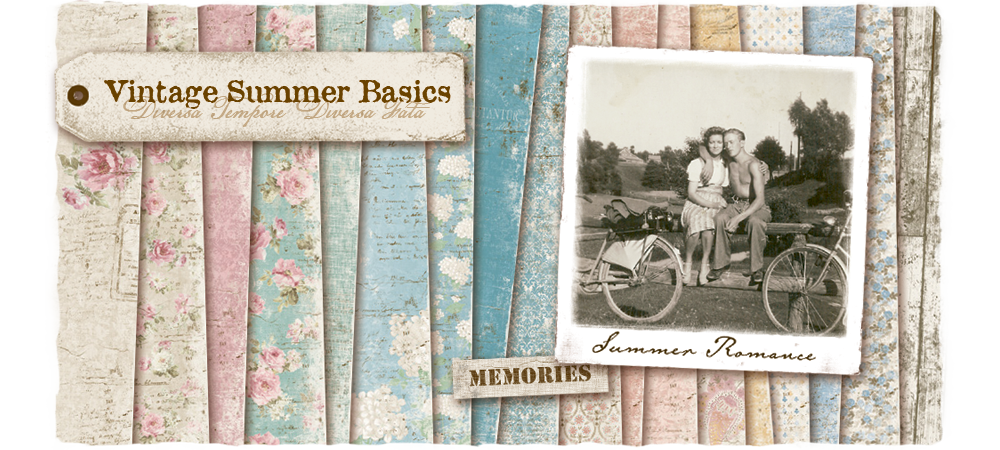
Two of my favorite Maja Design collections, Vintage Autumn Basics and Vintage Summer Basics, are used in the creation of this card. As usual, the paper is distressed, layered and stitched to form a base. One of the many things I adore about Maja Design paper is that it’s strong and behaves much like fabric when I’m working with it. As you can see, I really put it to the test and it holds up every time.

A 6

A 5

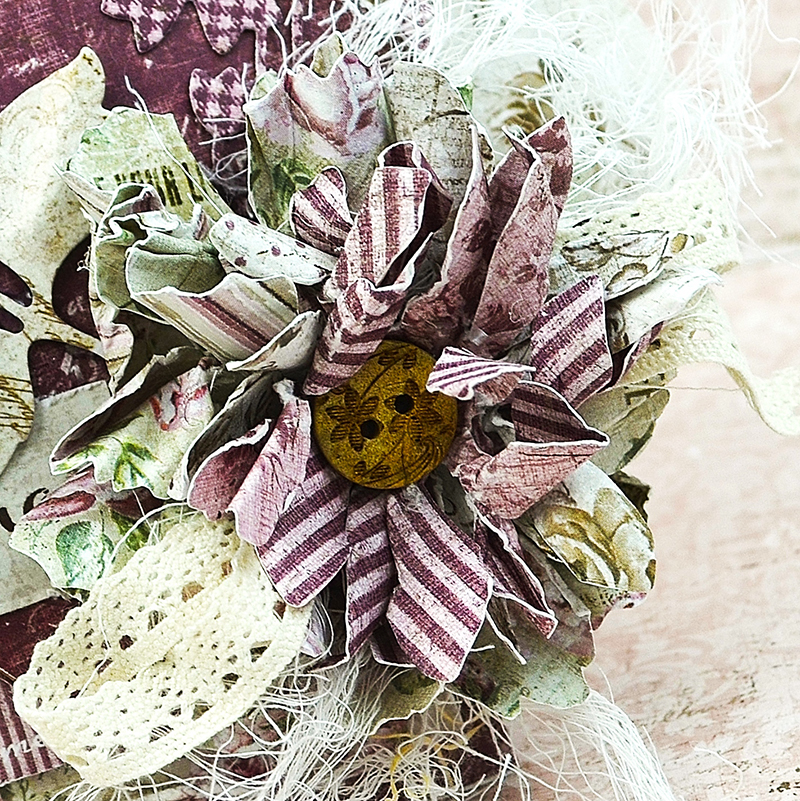
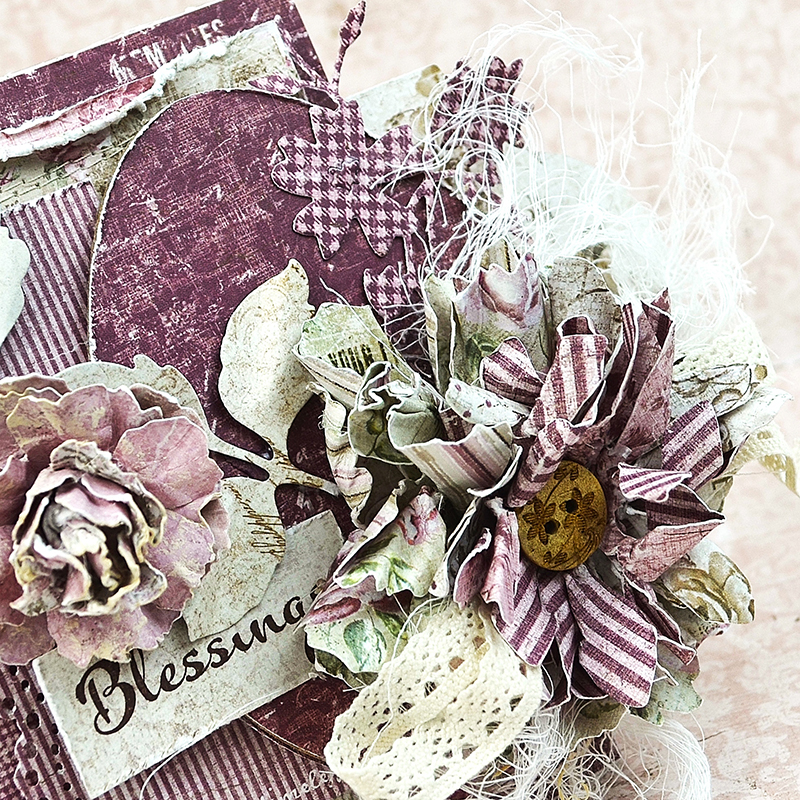
You’ll find a blooming rose and a wildflower gracing my little garden. If you visit my blog you’ll find tutorials for both styles of flowers as well as the Easter egg. A die cut flourish, ribbon and cheesecloth add a soft touch.

Design paper is border punched and layered to anchor the egg and florals. A die cut Spellbinder’s frame is tucked in behind the egg.

A 4

A 8

A 7

A 2

Vintage-Summer-Basics3

Additional Supplies: Martha Stewart Lace Border Punch, Sentiment Stamp, Archival Ink, Tim Holtz Tattered Florals Dies, Magnolia Rose Leaf Die, Flourish Die, Spellbinders Frame Die, Foam Adhesive, Button, Lace, Cheesecloth, Sewing Machine, Thread. 

Thank you so much for visiting! Don’t forget to check out the March Mood Board if you haven’t already done so. There’s still time to get your project entered. Sending wishes for sunny days filled with many joys!

Hugs,Nancy-sign


Guest Designer Eulanda Silvey

9

Posted by Carita Ruckman

20 March, 2017 - , , , ,

Write a comment

Hi,

My name is Eulanda Silvey and I will guest here at Maja today.

Eulanda-Silvey

My husband and I own our own business but we are lucky to have our weekends to ourselves.  This is where I find myself heading to my craft room when there isn’t other things we need to be doing.  We built a house recently and my craft room is only a set of french doors away from his man den.  I set it up this way so that I can open the doors and feel like I am spending a bit of time with him while he’s in his room watching tv and I’m in my room creating.  Clever huh?  LOL!!!  I’ve been crafting for about 10 years now and just love this hobby.  If I could play full time, I would!!


Coffee

Tea card 

I tried to keep this card from being covered in embellishments to show the gorgeous papers from the “Coffee in the Arbor” collection.  The image is from the “Delicious Moments” 12″ x 12″ and my bottom layers of the card are “Raspberries” and “Rose Garden” but from the 6″ x 6″ pad.  Yes I have both in many Maja collections.  LOL!  I layered with a square doily I had in my stash (well half of it) and a few more dies from Joy called “Cutting & Embossing Floral Edge Die” and “Cutting & Embossing Doily Edge Die”.  I’ve added various Wild Orchid Crafts flowers and a few leaves and finished it off with a row of white rose ribbon.

Cuddle Mice

Cuddle Mice  This card was fun to make but after I was finished I thought I should have made it into a canvas!  7″ x 7″ (almost 18cm x 18cm) and I still managed to have embellishments fall outside of that measurement! Well my thinking was that I wanted to added lots of embellishments but I also wanted to show some of Maja Design’s gorgeous “Vintage Romace” papers.  Ummm….well I tried!!!  LOL! The image is from Whimsy Stamps called “Cuddle Mice”. I added some “Diamond Dust”glitter to the pom pom on the hat and over the grey flooring.  FUN!!! After I added the WO English roses I put some glitter on those as well.  OH and I added more to the miniature glass jar.  Those are fun too!  The Marianne “tassel dies” are so easy to make but adding them under the “filigree flat back pearl”, wax cord bow and seam binding bow seemed like the perfect addition.

Summer Red

Red “Happy Summer” Card  I started with Dutch Doobadoo’s Card Art A4 Tent template and layered using Maja Design’s gorgeous Summertime collection.  For the image I used Summertime’s “In the Garden” and layered it over Joy’s “Framework with Rounded Corners” die.  For the top layer I added the “Happy Summer” strawberry stamp.  I then added some Wild Orchid Craft flowers as well as a hand made Foamiran flower (white) and layered all flowers with Foamiran leaves.  The shabby chic bow and rose charm were then popped on last for the finishing touch.

Summer Blue

Blue “Happy Summer” Card For this sweet card I did the same thing as the Red “Happy Summer Card” using the Art A4 Tent template from Dutch Doobadoo.  I loved the Summertime collection so I thought maybe I needed two of them.  The image is from the “By the Sea” diecuts paper and same with the “Happy Summer” stamp that I layered atop the image.  Under the image is a different Joy die called “Rectangle Frame with Circles”.  Again I made a flower bouquet using more Wild Orchid Craft flowers and another cream colored Foamiran flower.  I layered them with more Foamiran leaves but for this one I added a wood bark star from Noor! Design UK.  The filigree butterfly was from my stash.  

I hope you’ve enjoyed this one!  I know I did!
Thanks for stopping by!
Hugs!


Eulanda-sign

A Glimpse of You

1

Posted by Mary Tzalla

19 March, 2017 - ,

Write a comment

layout

Hello Maja fans!!!

It’s Mary here with you today sharing my latest layout featuring the beautiful ”Nyhavn” collection.

A sensational layout that was inspired by that beautiful photo which I found on Pinterest. And, before I continue I want to give all the proper credits to the photographer.

detail 1

I used for my background the ”Historical Atmosphere” paper and I made some layers behind my photo with the ”Strolling along the Canal” paper using both sides.

detail 2

I primed the background with white gesso and when it was dried, I added some texture with modeling paste and a stencil. Then, I used Lindy’s Stamp Gang sprays ”Hydrangea Blue”, ”Baby Blue Eyes Aqua” and ”Danny Zuko’s Denim” to give some color.

detail 3

detail 4

I heat embossed the ”Sammi’s Swirls” and the ”Corner Gemma’s” chipboards with ”Oakleaf Olive” Lindy’s Stamp Gang embossing powder. The title was treated in the same way. The chipboards I used are 2crafty and the flowers are Prima Marketing.

detail 5

To finish, I added some bronze micro beads and made some splatters with FW white ink.

Papers used:

Nyhavn-P

That’s all for today, my friends!

Thank you for stopping by!

Mary-sign (2)

Unconditional Love

0

Posted by Rachelle Sigurdson

18 March, 2017 - ,

Write a comment

Hello, today I would like to share with you, a LO I did, using Maja Design’s Vintage Autumn Basics Collection…..

07db336b115d401a92ef23db3c6161ab

The Maja Design used: Vintage Autumn Basics

Other Elements used: Dusty Attic Chipboard: Ornate Frame #6, Vintage Frame #4, Decorative Scroll #1, Ferns, Word Pack #14, Teeny Tiny ABC,  Prima Roses-Salvage District, Sunrise Sunset-silver, Petaloo Darjeeling Teastained Blues, Clear Crackle Paint, Prills-Silver, Shimmerz Inklings-Chocolate & Diamonds, giddy about green

Here are some close ups….

a00c3eb456e74946b4f5907c045d7ae4

For the background, I repeated distressed layers, of  no.XXII-BS, no.XX, no.XXII, & no.XIX as the top layer. I hand stitched these together, then distressed more using my fingers, & lifting the edges…

6165166efd8b4d91b573d0915a0a691b

I primed all of the chipboard with clear gesso, then applied clear crackle on to some of the pieces. Once the crackle dried I painted the pieces with Shimmerz Inklings chocolate & diamonds for the brown used, & giddy about green for the green used. I also inked the edges with a brown ink pad, versa mark-pine cone…

564afedfe2094aa987b33789f2171518

I framed all of the photo with the Vintage Frame, Ornate Frame & decorative scroll…

7a5f27e150aa4fb0a0d8b564d96f6617

For the flower clusters I used DA ferns, Prima roses-salvage district,sunrise-sunset, & Petaloo teastained blues (I altered the flower centers with Prills silver)….

Here are a few more close ups….

40260a3eade743fca34fe75c3cb062aa

917f539e48ab4d9f98ac0978dcc675b1

5a67758473e84fce9225d41be8e78bcc

49f479ca31824db9b2b7327b58dd7fbb

5f998cde83634c948b0f99198b6feb15

d7657aab2abf4c80adc139b296633b8f

Thank you so much for taking the time to look…..Rachelle

Rachelle-sign

When you feel like in Heaven

0

Posted by Elena Olinevich

17 March, 2017 - ,

Write a comment

Good morning, Maja Friends.

Not recently I’ve found the pictures I’ve made late spring . I realized I can not wait when the warmth will come for a long time. I miss those small shadows from the sun, the small leaves on the trees and the birds’ singing. So much.

So I decided to create a very light, simple Layout full of air.

Spring Layout by Elena Olinevich product by Maja Design

I didn’t want to make it busy with the embellishments, so I only added some paper layers using the die cuts and a few flowers.

Spring Layout with Maja Design and Spellbinders

It was so easy to do and to keep the shabby feeling.

Spring Layout with Maja Design and Spellbinders1

I didn’t want to give it bright colors, I like such moderate and translucent view. so I chose Vintage Romance collection

Spring Layout with Maja Design and Spellbinders2

Have a wonderful Friday and hope that your winter is warm.

Products used:

Vintage Romance

Spellbinders Dies. Prima Marketing Flowers.

Elena-sign

Save