Wintertime

0

Posted by Kerstin-Inga Peters

17 January, 2020 - , ,

Write a comment

Welcome friends and happy new year everyone!!

  I hope you’ve all had a wonderful Christmas and a good start into a new creative year!

I was inspired to create a new mixed media layout in vintage style.

In keeping with the season in a natural winter theme.

some close up’s


I used our wonderful winter collection ‘Holiday in the Alps’

Deers

Deers

A New Year

A new year

A New Year-bs

Thanks for your visit!

Vintage Winter cards

1

Posted by Evgenia Petzer

27 August, 2016 - ,

Write a comment

Hello dear friends! Its Evgenia Petzer with you today.

Yes, you read it write- some winter cards in the end of summer…

Sometimes it just itches for me to start creating something certain, this time I just needed to create some christmas cards. And The Vintage Winter is one of the oldest, but still my favourite winter Maja collections. So I pulled the paper pad from this collection and made two these cards just for fun.

vintage_winter_Card1_majadesign_petzer

Lots of layers n both of the cards, lots of little details, some stitching with contrast color cotton thread…

vintage_winter_Card1_majadesign_petzer_det1 vintage_winter_Card1_majadesign_petzer_det2 vintage_winter_Card1_majadesign_petzer_det3

Though the second card is exactly from the same collection its in another color scheme

vintage_winter_Card2_majadesign_petzervintage_winter_Card2_majadesign_petzer_det1 vintage_winter_Card2_majadesign_petzer_det2 vintage_winter_Card2_majadesign_petzer_det3 vintage_winter_Card2_majadesign_petzer_det4

One of my favorite winter/christmas collections of all the times:

To create both of these cards I have used the paper pad of this collection.

Have a lovely sunny weekend,

Winter

2

Posted by Pascale B

24 January, 2016 - , ,

Write a comment

Hello Sweeties
Today, I’m up on Maja Design with a winter page.

Winter_PB(Photo de Richard Loader) 

I began to cover the background page with clear gesso. When dry, I did some random stamping and added black bister. To prevent the bister from reacting afterward, I sprayed a fixative on the whole page before continuing.

Winter_detail0_PB

I added more colors to the background with differents Twinkling H2Os. With a stencil and white crackle paste, I added also a design, which I covered with white Art Sugar while the paste was still wet.

Winter_detail1_PB

I colored the die-cut leaves and branches with Twinkling H2Os too.

Winter_detail2_PB

I distressed the papers under the photo and lightly inked the edges.

Winter_detail3_PB

I used 3D Matte Gel to glue all the elements to the background.

Winter_detail4_PB


Maja Design papers used:

Together Can't wait bs 22th of December BS Christmas Carols
Home for Holidays
Vintage Winter
Vintage Frost basics
Together Can’t wait bs Christmas Carols 22th of December bs

My Winter Wonderland

4

Posted by Silje Kristin Aunan

1 November, 2015 - , ,

Write a comment

Hello Everyone <3

Today it is me, Silje Kristin that will inspire you, with something I’ve never have done before.

This weekend I took a trip down to southern Norway, and visited a lovely town called Tønsberg. I traveled on Thursday to have the entire weekend along with scrapping happy ladies. I’m having a great time, and some great days here at the scrapbooking event. I have meet many new and wonderful scrappers and enjoyed hours after hours with papers.

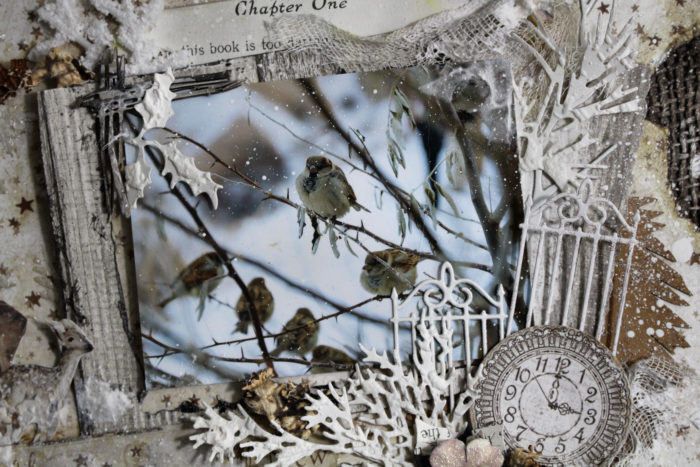
Do you remember my last post? I told you I’d show you one big project. I was then in a scrapbooking event here in my home town, Bodø. That weekend I spent 21 hours making something I’ve never tried before. The inspiration I got from an intro of a TV series and the winter theme.


I decided to create one ferris wheel. The ferris wheel is made without a tutorial. I used about five hours to make the two wheels. Around the wheels I have attached white pearl string. The ferris wheel is assembled in the same as the wheels. Also these, I’ve created without a tutorial.

In between the wheels I have attached paper straws, which I have distressed with Distress Mini Ink. On every paper straws, a small trolley hanging down. The trolleys are made of four circles. I’ve used a thin white tape around, to create a special effect.

On the front on the wheels, I have some big snow crystals, these are wood from Wycinanka. I have covered them with snow and glitter from Distress Ink.

The details I have made and placed around the ferris wheel are made by hand. Here you will find shoes, snowmen, christmas trees, deer, christmas gifts and bullfinch.

The shoes are painted white, and then I have some snow and glitter on them <3

I have made two snowmen, which are made with a tutorial that I have made myself. Both snowmen are covered with snow and glitter, that you can see is everywhere on the project.

Behind the ferris wheel and at the front, I have some deer. This is a dies set from Marianne Design.

On the green chrismas trees I’ve used glitter and snow.  In and on the trees you can see christmas baubles in blue and  bullfinch.

The bullfinch is a dies set from kaBoks, this is one set of three size and they are perfect to have between flowers, or as I have done, glued them on the christmas trees <3

The final details of the project are tree packages in three sizes. Each package has its own tag, ribbon and snow <3

If you put all the details together, you have a lovely winter wonder land, with wonderful snow and glitter <3

The entire project is made on the back of a shelf. In the corners I have attached silver feet and atop of the brown carton I have covered it all with white snow and glitter.

I have used paper from two diffrent collections from Maja Design.

Frost-Basics-P

Wintage-vinter-P

I hope you are inspired to create your own winter wonderland <3

SiljeKristin-sign


Ski fun ♥

3

Posted by Camilla Støen Bakke

27 January, 2013 - , ,

Write a comment

067Hi there! I hope you are having a lovely Sunday so far!

On Thursday evening the snow came here where I live in Norway. Everything lightens up, and I am sure many enjoy the fun things you can do in the snow:) I was inspired to make a card with the snow theme.

Norway is a country where they say that we are born with ski on:) And it is a really popular sport for everyone in all ages. When I was a little girl I was out in the snow all the time, and loved skiing. This year we haven’t had much snow, you have to go up in the mountains. But it has been really nice skating weather, with ice on all the small lakes and waters here.

010I wanted to make it a bit feminine to all the blue winter colours, and added the purple colour to the papers and image.

The papers I have used are from the lovely Maja Design collections:

Fika-P1 Wintage-vinter-P

Fika: Lejas cafè

Vintage Winter: Winter Wonderland, Winter Night024

I want to show you some of the details on my Easel Card. It has been a while since I made an Easel Card, and it was really fun to make one again.028

The image from Magnolia is coloured with Distress Ink, reinkers. Here you can see the whole card.

047

The ribbon is a seem binding ribbon which I have coloured with Distress Ink reinker-Faded Jeans, Opalite and water to make it match the blue colours in the Maja Design paper. I curled it up good with my hands and laid it to dry for some hours. When it is dry it looks really crispy and vintage, like you can see here.052 Supplies:

Papers: Maja Design: Fika-Lejas Cafè, Vintage Winter-Winter Wonderland, Winter Night, Bazzill-Vanilla, Kraft Cardstock. Stamps: Magnolia, Stempelglede. Ink & colouring: Archival Ink-Jet Black, Distress Ink pad-Walnut Stain, Distress Ink-Reinkers & Markers, Crackle Paint-Picket Fence, Rock Candy, Stickles-Star Dust, Crackle Accents, Panduro-Snow Paint. Dies: Magnolia, Spellbinders, Martha Stewart and Tim Holtz. Other: Cheese Cloth, Doily, Seem Binding Ribbon, Wild Orchid Crafts-flowers, metal corner. All paper edges are sewed with sewing machine.

Thank you so much for visiting, and be sure to be back soon because my teammates really rocks!! You don’t want to miss out on anything!:)Camilla-sign