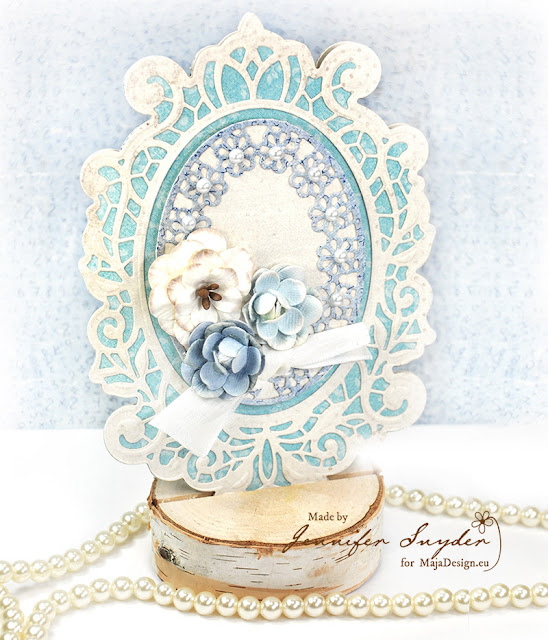
Tired of your basic rectangular card shape? Looking for a change? Need a unique card for someone extra special?
If so, then this is the perfect place to stop for a super simple card making tutorial.
Jennifer Snyder here today. I’m really bored of making rectangle or square cards. I need to change things up and add shape to my cardmaking life.
I have some incredible dies and head turning paper from Maja Design that will help make this project perfect.
I’m using the Maja Design – Denim & Friends 12×12 paper collection along with a new Spellbinders die, Spellbinders Designer Series -Venise Lace Victoriana Crest by Becca Feeken as my inspiration.
These are the Maja Design papers I chose for this card. Jeans & T-Shirt, Fashion, Sneakers
Here Are My Instructions:
Step 1.
Using a 12×12 sheet from Maja Design – Denim & Friends, grab a die that will make a nice card shape. I chose a die that was quite large to make a sizable card. My paper choice is Jeans & T-Shirt from Denim & Friends, and the die is Spellbinders Designer Series -Venise Lace Victoriana Crest by Becca Feeken .
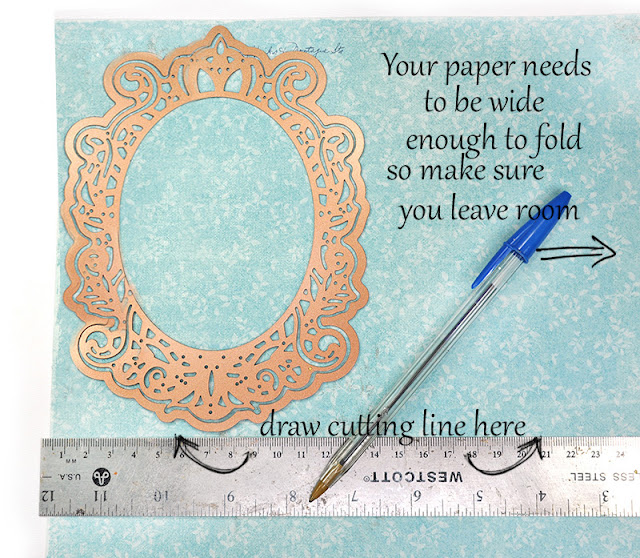
First, decide how much paper you need and where to cut your paper. Your paper must be wide enough to fold – meaning you will be die cutting two layers at the same time. Leave enough width to the right on your paper.
Place the die on the paper and draw a line to mark how long the die is and where you need to cut and where you will fold. This step is important.
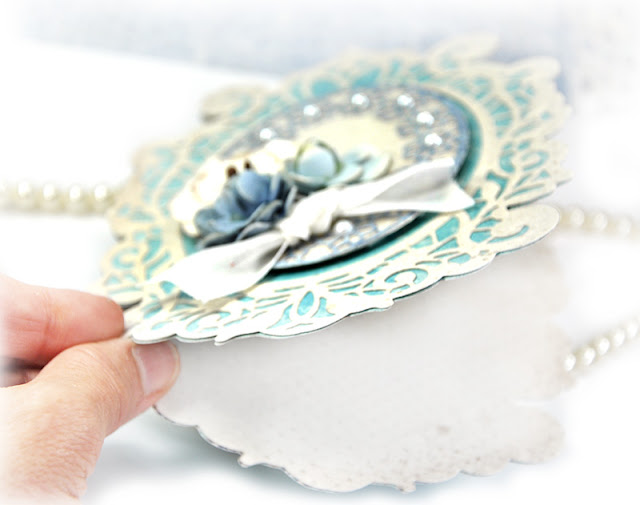
Step 2. After cutting the length of paper to fit the die shape, fold the paper. The die needs to hang over the edge of the paper fold slightly in order to create a card that will open. Once your die is in place, secure with tape and run the folded paper/die through your die cutter.
 Step 3. When you open your card, it should be connected at the fold. If it is, Great job! If it falls apart into two pieces, it just means you probably did not let the die hang over the edge of the fold quite enough. Try again and move the die over a bit more.
Handy suggestion…try this technique first on a yucky sheet of paper and not your gorgeous Maja Design papers.
Step 5. When I opened the card, there was too much pattern for writing a sentiment. I cut a separate die to glue on the inside.
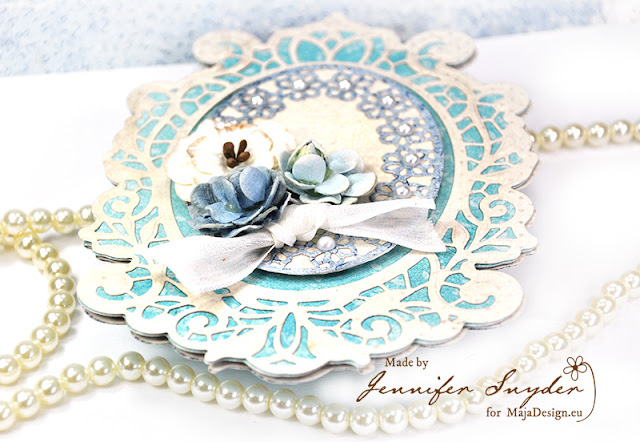
Step 6. Decorate as desired. I added another die cut from the Spellbinders die to use for the center. I added dimension to the card using foam dots (cardboard, foam tape) for dimension as you can see in the image below.
To finish off the piece, I used pearl adhesives, a simple ribbon and some coordinated Petaloo flowers. 

And that’s all there is to creating a unique and graceful card that is NOT traditionally shaped. Ahhhhh makes my heart happy and my creative spirit dance.
Thanks for your time today. I value your visit.
You can shop for Maja Design products here.


1 Comment
As always you ´ve made a wonderful card here Jennifer. I love Beccas dies too, and together with these amazing papers, it can only be a wonderful result, as it also did here. It´s really beautiful and perfect made.
Have a wonderful week-end ahead here everyone.