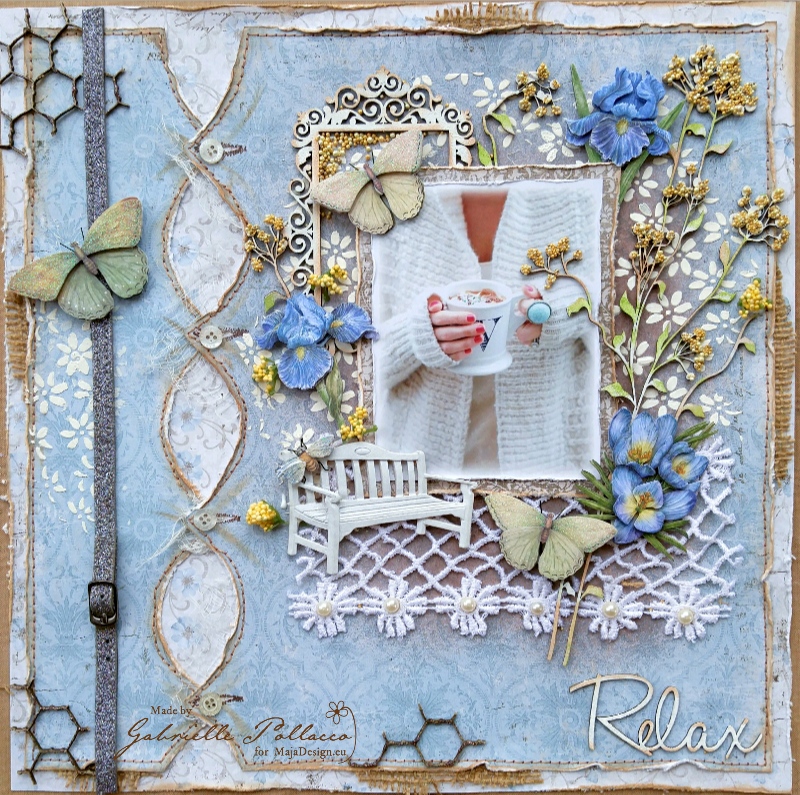
Hello everyone, Gabrielle here with you today! Yup, I’m back for a little guest spot! When I received the gorgeous Vintage Romance collection in the mail a couple weeks ago, I felt compelled to make up a layout & video tutorial with these stunning papers!
I used ‘Happily Ever After’, ‘Together Forever’ and ‘Words of Love’ for my page design. I was going for a fabricky (is that a word? LOL) look on this layout, so I added a little machine stitching on the background design, this is optional, I think it can look equally as nice if you leave that off (if you are not a sewer).
So grab your favorite beverage, take a little break and enjoy!….
[youtube http://www.youtube.com/watch?v=wU7IfCNV9LA?rel=0]
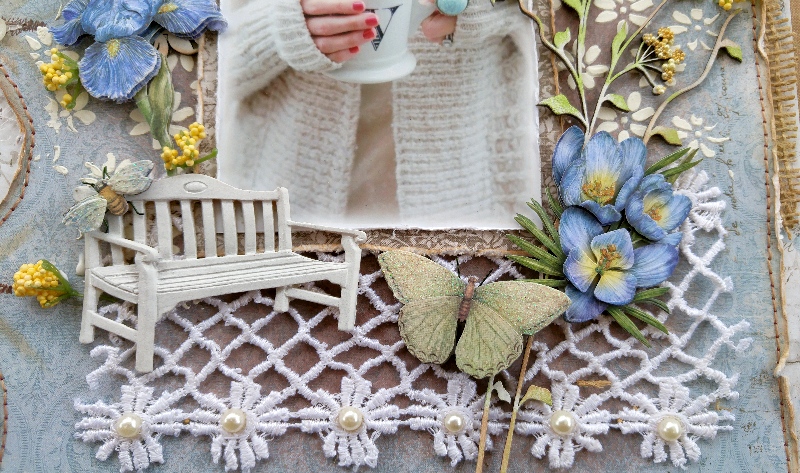
I hope you enjoyed my little tutorial! Here are a few close-ups you all can enjoy at your leisure….
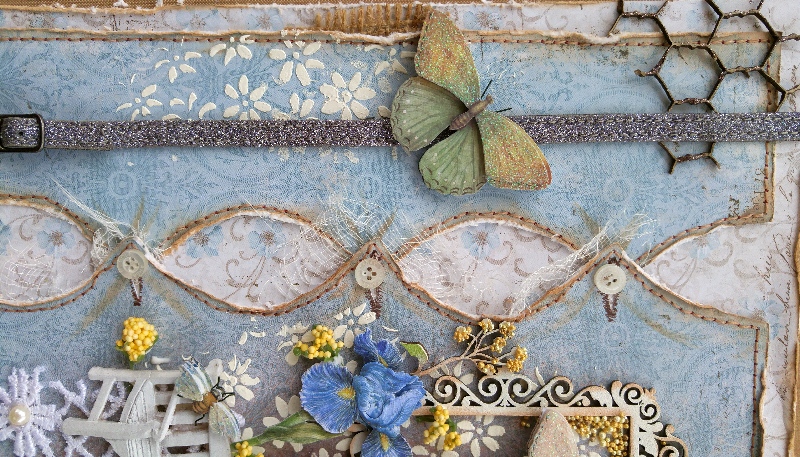
I have this close-up turned on it’s side just so you can get a more close-up and personal look at it. I simply followed the pattern in the paper to create my button hole design…makes it easy to space out the design.
The next step was to add a little color just directly behind the photo area using some Shimmerz spray called ‘See Ya Latte’ Spritz….then I applied some home-made texture paste through a Dusty Attic stencil called Flower Power. I was going for a kind of Bohemian-chic look and I thought this daisy design would work well with it. I also matted my photo with the backside of the ‘Words of Love’ paper, I do love browns with blues!
To continue the fabric idea of my page I also included a pretty strip of lace that I got from Tresor’s de Luxe, which I adhered with Tombow liquid adhesive. I prefer this glue as it allows you to readjust your placement if need be without making a big mess on the paper (let the glue sit for a few minutes to set up before you apply your embellishment to the page.
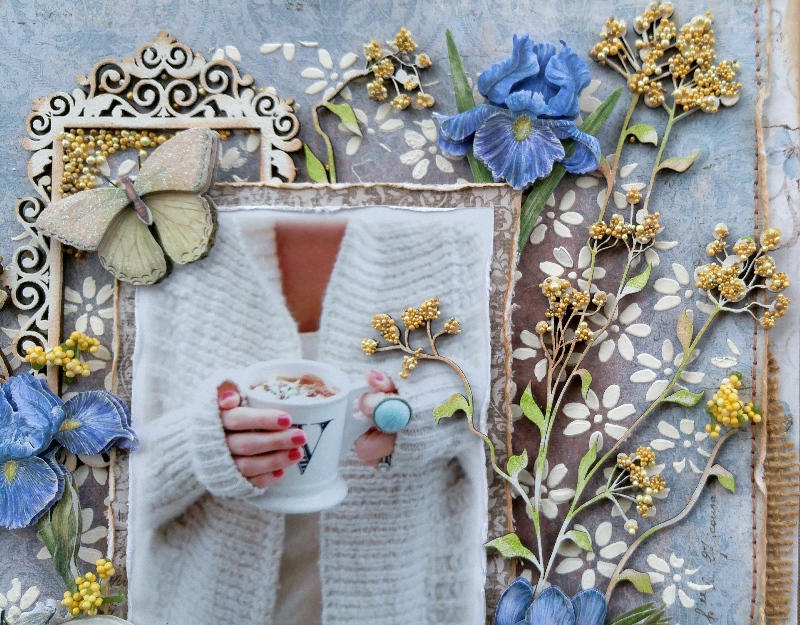
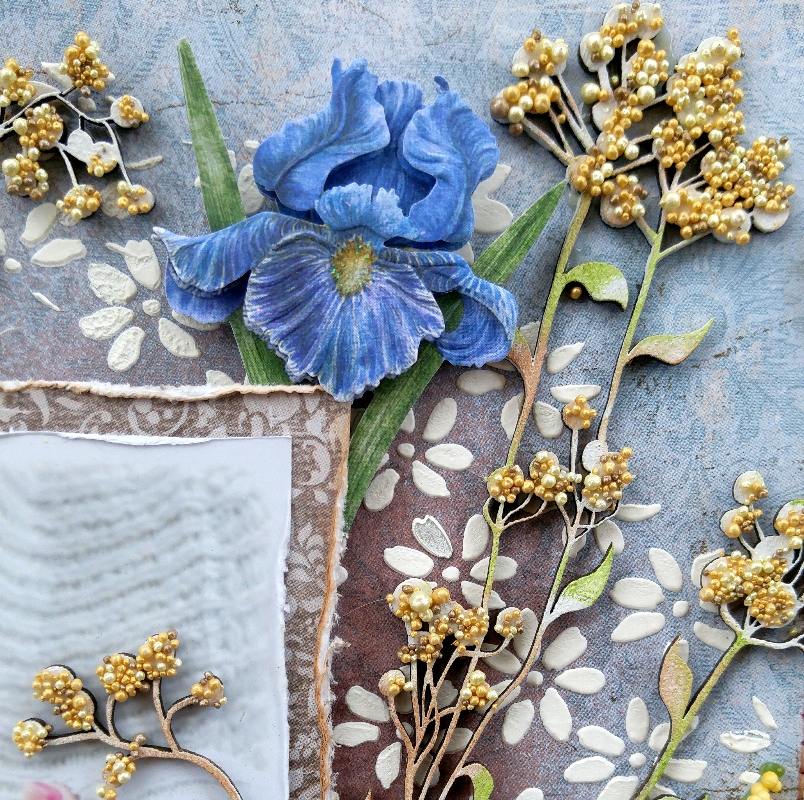
I had a little fun with my embellishments on this one….I tried a new product (at least to me) called Prills, they are these little balls that come in different colors. Here I using the color called A-maized. I just applied a little glue to the tops of the blossoms of the Wild-Flowers #4 chippie by Dusty Attic and poured the little pebbles onto it…..I really love the effect!
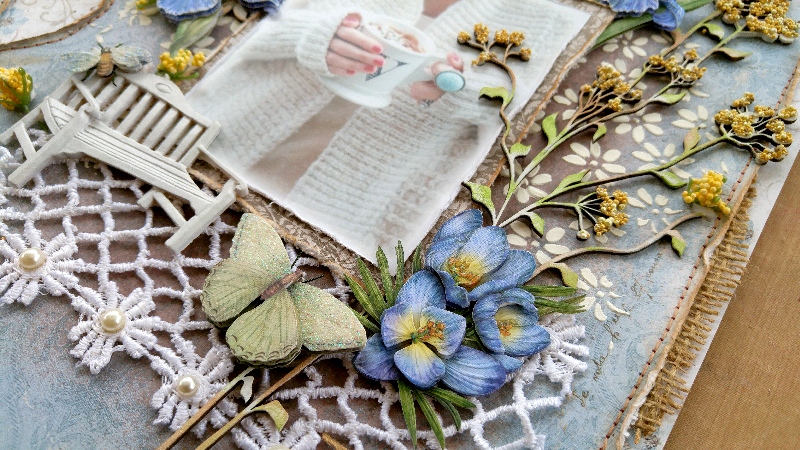
I finished my design by adding some layered floral and butterfly stickers by K&Company in a few strategic areas of my photo area. Added a small shabby-chic bench embellishment by Prima and a few adhesive pearls on the lace panel. Done!
I hope you enjoyed my tutorial today and hope you feel inspired to try your hand with the gorgeous new Vintage Romance collection, I know I’m going to keep playing (I’ve got me some of those pretty pink papers ear-marked for another layout)! Thanks for stopping by the Maja Design blog today, we appreciate and read all the lovely comments and feedback! xo

1 Comment
What an amazing layout! So happy and cheerful….and love all the little details!